理解視圖
在MVC框架中,字母“V”代表視圖(Views)。它分離了應用程式邏輯並展現邏輯。視圖檔存儲在 resources/views目錄。一般來說,視圖是包含了應用程式的HTML。
示例
第1步 - 複製下麵的代碼,並將其保存在 resources/views/test.php
<html>
   <body>
      <h1>Hello, World</h1>
   </body>
</html>
app/Http/routes.php
Route::get('/test', function(){
   return view('test');
});
http://localhost:8000/test

將數據傳遞到視圖
當構建應用程式時,可能需要將數據傳遞到視圖。傳遞一個數組到視圖助手函數。傳遞一個數組後,我們可以使用它的鍵在HTML檔中來獲得鍵對應的值。
示例
第1步 - 複製下麵的代碼,並將其保存在 resources/views/test.php
<html>
   <body>
      <h1><?php echo $name; ?></h1>
   </body>
</html>
app/Http/routes.php
Route::get('/test', function(){
   return view('test',[‘name’=>’zaixian’]);
});
http://localhost:8000/test
所有視圖數據共用
我們已經看到如何能夠將數據傳遞給視圖,但有時,有必要將數據傳遞到所有的視圖。Laravel使得這更簡單。有一個叫作 “share()” 方法,該方法可以用於這一目的。share() 方法帶有兩個參數,key和value。通常 share() 方法可以從服務提供者的啟動方法被調用。我們可以使用任何服務提供者,AppServiceProvider或我們自己的服務提供者。
示例
app/Http/routes.php
Route::get('/test', function(){
   return view('test');
});
Route::get('/test2', function(){
   return view('test2');
});
第2步-創建兩個視圖檔-test.php和test2.php的代碼相同。以下是兩個檔,這將共用數據。將以下代碼複製到這兩個檔中。resources/views/test.php & resources/views/test2.php
<html>
   <body>
      <h1><?php echo $name; ?></h1>
   </body>
</html>
第3步- 更改啟動方法的代碼在檔 - app/Providers/AppServiceProvider.php 如下所示.
(在這裏,我們使用了共用方法,而且我們通過與所有的視圖共用數據。) app/Providers/AppServiceProvider.php
<?php
namespace App\Providers;
use Illuminate\Support\ServiceProvider;

class AppServiceProvider extends ServiceProvider {

   /**
   * Bootstrap any application services.
   *
   * @return void
   */

   public function boot(){
      view()->share('name', 'zaixian');
   }

   /**
   * Register any application services.
   *
   * @return void
   */

   public function register(){
      //
   }
}
http://localhost:8000/test
http://localhost:8000/test2
Blade範本
Blade是一個簡單,為Laravel提供的強大範本引擎。Blade是Laravel羽量級範本語言,它的語法非常簡單易學。blade範本包含擴展— blade.php 並存儲在目錄 resources/views.
Blade也支持所有PHP的主要構造器,創造迴圈和條件 — @for, @foreach, @while, @if 和 @elseif, 使您以避免開在範本到處使用<?php標記。Blade 範本的主要優點是,我們可以設置主範本,這個主範本可以被另一個頁面進行擴展。
示例
第1步 - 創建一個主範本,並將其保存在 - resources/views/layouts/master.blade.php.
<html>

   <head>
      <title>@yield('title')</title>
   </head>

   <body>
      @section('sidebar')
      This is the master sidebar.
      @show

      <div class = "container">
         @yield('content')
      </div>

   </body>
</html>
-
@yield('title') 用於顯示的標題的值
-
@section('sidebar')用於定義命名側邊欄部分
-
@show 用於顯示一個部分內容
-
@yield('content') 用於顯示 content 的內容
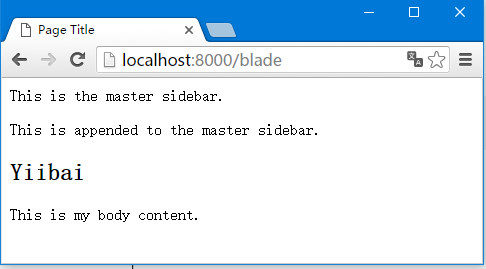
第3步 - 現在,創建另一個頁面並擴展主範本,並將其保存在 - resources/views/page.blade.php
@extends('layouts.master')
@section('title', 'Page Title')

@section('sidebar')
   @parent
      <p>This is appended to the master sidebar.</p>
   @endsection

   @section('content')
      <h2>{{$name}}</h2>
      <p>This is my body content.</p>
   @endsection
@extends('layouts.master') 用於擴展主佈局。“layouts.master” — 在這裏,layouts 是目錄的名稱,在這裏我們已經存儲在主範本 和 主範本 “master.blade.php”,這裏“.master”是指其名字,但這裏使用名稱而不帶擴展 blade.php
-
@section('title', 'Page Title') − 設置的標題部分的值
-
@section('sidebar') − 定義主佈局的子頁面側邊欄部分。
-
@parent − 在主佈局定義中顯示側邊欄部分的內容。
-
<p> − 這是追加到主側邊欄。</p> 增添一段內容到側邊欄部分
-
@endsection − 結束側邊欄部分。
-
@section('content') − 定義內容部分。
-
@section('content') − 增添段的內容到content 部分。
-
@endsection − 結束該內容部分。
第5步 - 現在,建立路由查看此範本。添加下麵一行到檔 - app/Http/routes.php
Route::get('blade', function () {
   return view('page',array('name' => 'zaixian'));
});
http://localhost:8000/blade