扩展是在Yii中的应用中专门设计使用的包。你可以分享自己的代码作为一个扩展或使用第三方扩展功能添加到您的应用程序中。
使用扩展
大多数扩展分发作为 Composer 包。Composer 从Packagist安装软件包 - Composer 包库。
要安装第三方扩展,应该 -
-
添加扩展到composer.json文件。
-
运行 composer 安装。
添加日期和时间窗口小部件
让我们添加一个整洁的日期时间窗口小部件到项目中。
第1步- 使用以下方式修改基本的应用程序模板中的composer.json文件。
{
   "name": "yiisoft/yii2-app-basic",
   "description": "Yii 2 Basic Project Template",
   "keywords": ["yii2", "framework", "basic", "project template"],
   "homepage": "http://www.yiiframework.com/",
   "type": "project",
   "license": "BSD-3-Clause",
   "support": {
      "issues": "https://github.com/yiisoft/yii2/issues?state=open",
      "forum": "http://www.yiiframework.com/forum/",
      "wiki": "http://www.yiiframework.com/wiki/",
      "irc": "irc://irc.freenode.net/yii",
      "source": "https://github.com/yiisoft/yii2"
   },
   "minimum-stability": "stable",
   "require": {
      "php": ">=5.4.0",
      "yiisoft/yii2": ">=2.0.5",
      "yiisoft/yii2-bootstrap": "*",
      "yiisoft/yii2-swiftmailer": "*",
      "kartik-v/yii2-widget-datetimepicker": "*"
   },
   "require-dev": {
      "yiisoft/yii2-codeception": "*",
      "yiisoft/yii2-debug": "*",
      "yiisoft/yii2-gii": "*",
      "yiisoft/yii2-faker": "*"
   },
   "config": {
      "process-timeout": 1800
   },
   "scripts": {
      "post-create-project-cmd": [
         "yii\\composer\\Installer::postCreateProject"
      ]
   },
   "extra": {
      "yii\\composer\\Installer::postCreateProject": {
         "setPermission": [
            {
               "runtime": "0777",
               "web/assets": "0777",
               "yii": "0755"
            }
         ],
         "generateCookieValidationKey": [
            "config/web.php"
         ]
      },
      "asset-installer-paths": {
         "npm-asset-library": "vendor/npm",
         "bower-asset-library": "vendor/bower"
      }
   }
}
我们已经添加了依赖 "kartik-v/yii2-widget-datetimepicker": "*" 到必需(required)部分。
第2步 - 现在,项目的根里面,运行 composer update 来更新所有的依赖。
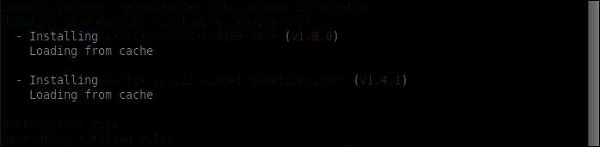
我们刚刚安装扩展。你会在 vendor/kartik-v/yii2widget-datetimepicker 文件夹的 DateTimePicker 里面找到。
第3步 - 要在页面中显示新安装的小工具,修改 SiteController 的 actionAbout 方法对应的 About 视图 。
<?php
   /* @var $this yii\web\View */
   use kartik\datetime\DateTimePicker;
   use yii\helpers\Html;
   $this->title = 'About';
   $this->params['breadcrumbs'][] = $this->title;
   $this->registerMetaTag(['name' => 'keywords', 'content' => 'yii, developing, views,
      meta, tags']);
   $this->registerMetaTag(['name' => 'description',
      'content' => 'This is the description of this page!'], 'description');
?>
<div class="site-about">
   <h1><?= Html::encode($this->title) ?></h1>
   <p>
      This is the About page. You may modify the following file to customize its content:
   </p>
   <?php
      echo DateTimePicker::widget([
         'name' => 'dp_1',
         'type' => DateTimePicker::TYPE_INPUT,
         'value' => '1992-10-12 10:10',
         'pluginOptions' => [
            'autoclose'=>true,
            'format' => 'yyyy-mm-dd hh:ii'
         ]
      ]);
   ?>
</div>
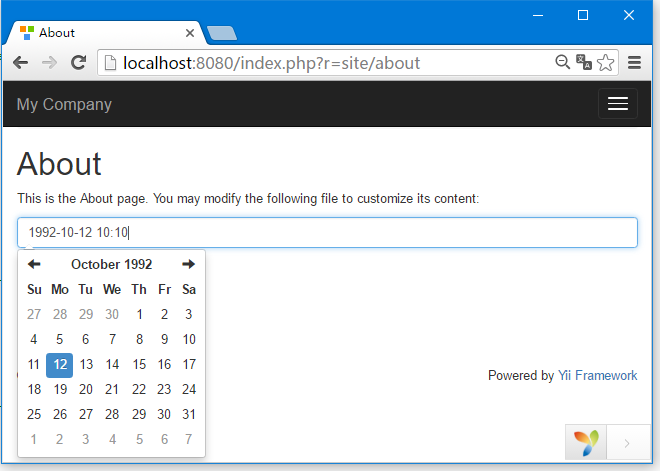
第4步 - 现在,运行PHP项目根下的内置 PHP服务器 php -S localhost:8080t web 命令。
第5步 - 在浏览器中打开URL=> http://localhost:8080/index.php?r=site/about. 你会看到一个整洁的DateTimePicker,如下面的屏幕截图。
上一篇:
Yii Asset转换
下一篇:
Yii创建扩展