Angular 2 TypeScript 環境配置
本章節使用的是 TypeScript 來創建 Angular 的應用,這也是官方推薦使用的,本教學的實例也將採用 TypeScript 來編寫。
TypeScript 是一種由微軟開發的自由和開源的編程語言,它是JavaScript的一個超集,擴展了JavaScript的語法。
如果你不了解TypeScript,可以查閱以下資料:
這開始前,你需要確保你已經安裝了 npm,如果你還沒安裝npm或者不了解 npm 可以查看我們的教學:NPM 使用介紹。
由於 npm 官網鏡像國內訪問太慢,這裏我使用了淘寶的npm鏡像,安裝方法如下:
$ npm install -g cnpm --registry=https://registry.npm.taobao.org
執行後我們就可以使用 cnpm 命令來安裝模組:
$ cnpm install
第一步:創建與配置專案
創建目錄
$ mkdir angular-quickstart
$ cd angular-quickstart
創建配置檔
Angular 專案需要以下幾個配置檔:
- package.json 標記本項目所需的 npm 依賴包。
- tsconfig.json 定義了 TypeScript 編譯器如何從專案原始檔案生成 JavaScript 代碼。
- typings.json為那些 TypeScript 編譯器無法識別的庫提供了額外的定義檔。
- systemjs.config.js 為模組加載器提供了該到哪里查找應用模組的資訊,並註冊了所有必備的依賴包。 它還包括文檔中後面的例子需要用到的包。
在 angular-quickstart 中創建以下幾個檔,代碼如下所示:
package.json 檔:
{
"name": "angular-quickstart",
"version": "1.0.0",
"scripts": {
"start": "tsc && concurrently \"npm run tsc:w\" \"npm run lite\" ",
"lite": "lite-server",
"postinstall": "typings install",
"tsc": "tsc",
"tsc:w": "tsc -w",
"typings": "typings"
},
"license": "ISC",
"dependencies": {
"@angular/common": "2.0.0",
"@angular/compiler": "2.0.0",
"@angular/core": "2.0.0",
"@angular/forms": "2.0.0",
"@angular/http": "2.0.0",
"@angular/platform-browser": "2.0.0",
"@angular/platform-browser-dynamic": "2.0.0",
"@angular/router": "3.0.0",
"@angular/upgrade": "2.0.0",
"core-js": "^2.4.1",
"reflect-metadata": "^0.1.3",
"rxjs": "5.0.0-beta.12",
"systemjs": "0.19.27",
"zone.js": "^0.6.23",
"angular2-in-memory-web-api": "0.0.20",
"bootstrap": "^3.3.6"
},
"devDependencies": {
"concurrently": "^2.2.0",
"lite-server": "^2.2.2",
"typescript": "^2.3.4",
"typings":"^1.3.2"
}
}
tsconfig.json 檔:
{
"compilerOptions": {
"target": "es5",
"module": "commonjs",
"moduleResolution": "node",
"sourceMap": true,
"emitDecoratorMetadata": true,
"experimentalDecorators": true,
"removeComments": false,
"noImplicitAny": false
}
}
typings.json 檔:
{
"globalDependencies": {
"core-js": "registry:dt/core-js#0.0.0+20160725163759",
"jasmine": "registry:dt/jasmine#2.2.0+20160621224255",
"node": "registry:dt/node#6.0.0+20160909174046"
}
}
systemjs.config.js 檔:
(function (global) {
System.config({
paths: {
'npm:': 'node_modules/'
},
map: {
app: 'app',
'@angular/core': 'npm:@angular/core/bundles/core.umd.js',
'@angular/common': 'npm:@angular/common/bundles/common.umd.js',
'@angular/compiler': 'npm:@angular/compiler/bundles/compiler.umd.js',
'@angular/platform-browser': 'npm:@angular/platform-browser/bundles/platform-browser.umd.js',
'@angular/platform-browser-dynamic': 'npm:@angular/platform-browser-dynamic/bundles/platform-browser-dynamic.umd.js',
'@angular/http': 'npm:@angular/http/bundles/http.umd.js',
'@angular/router': 'npm:@angular/router/bundles/router.umd.js',
'@angular/forms': 'npm:@angular/forms/bundles/forms.umd.js',
'rxjs': 'npm:rxjs',
'angular2-in-memory-web-api': 'npm:angular2-in-memory-web-api',
},
packages: {
app: {
main: './main.js',
defaultExtension: 'js'
},
rxjs: {
defaultExtension: 'js'
},
'angular2-in-memory-web-api': {
main: './index.js',
defaultExtension: 'js'
}
}
});
})(this);
接下來我們使用 cnpm 命令來安裝依賴包:
$ cnpm install
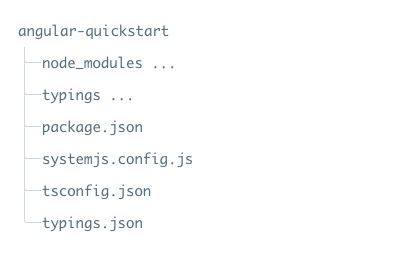
執行成功後,angular-quickstart 目錄下就會生成一個 node_modules 目錄,這裏包含了我們這個實例需要的模組,我們可以看下專案的目錄結構:
第二步:創建應用
我們用 NgModules 把 Angular 應用組織成了一些功能相關的代碼塊。
Angular 本身是被拆成一些獨立的 Angular 模組,這樣我們在應用中只需要導入需要的 Angular 部分。
每個 Angular 應用至少需要一個root module(根模組) ,實例中為 AppModule 。
接下來我們在 angular-quickstart 目錄下創建 app 目錄:
$ mkdir app
$ cd app
然後在 app 目錄下創建 app.module.ts 檔,代碼如下所示:
app.module.ts 檔:
import { NgModule } from '@angular/core';
import { BrowserModule } from '@angular/platform-browser';
@NgModule({
imports: [ BrowserModule ]
})
export class AppModule { }
由於 QuickStart 是一個運行在流覽器中的 Web 應用,所以根模組需要從 @angular/platform-browser 中導入 BrowserModule 並添加到 imports 數組中。
創建組件並添加到應用中
每個 Angular 應用都至少有一個根組件, 實例中為 AppComponent,app.component.ts 檔代碼如下:
app.component.ts 檔:
import { Component } from '@angular/core';
@Component({
selector: 'my-app',
template: '<h1>我的第一個 Angular 應用</h1>'
})
export class AppComponent { }
代碼解析:
以上代碼從 angular2/core 引入了 Component 包。
@Component 是 Angular 2 的裝飾器 ,它會把一份元數據關聯到 AppComponent 組件類上。
my-app 是一個 CSS 選擇器,可用在 HTML 標籤中,作為一個組件使用。
@view 包含了一個 template ,告訴 Angular 如何渲染該組件的視圖。
export 指定了組件可以在檔外使用。
接下來我們重新打開 app.module.ts 檔,導入新的 AppComponent ,並把它添加到 NgModule 裝飾器的 declarations 和 bootstrap 字段中:
app.module.ts 檔:
import { NgModule } from '@angular/core';
import { BrowserModule } from '@angular/platform-browser';
import { AppComponent } from './app.component';
@NgModule({
imports: [ BrowserModule ],
declarations: [ AppComponent ],
bootstrap: [ AppComponent ]
})
export class AppModule { }
第四部:啟動應用
接下來我們需要告訴 Angular 如何啟動應用。
在 angular-quickstart/app 目錄下創建 main.ts 檔,代碼如下所示:
main.ts 檔:
import { platformBrowserDynamic } from '@angular/platform-browser-dynamic';
import { AppModule } from './app.module';
const platform = platformBrowserDynamic();
platform.bootstrapModule(AppModule);
以上代碼初始化了平臺,讓你的代碼可以運行,然後在該平臺上啟動你的 AppModule。
定義該應用的宿主頁面
在 angular-quickstart 目錄下創建 index.html 檔,代碼如下所示:
index.html 檔:
<html>
<head>
<title>Angular 2 實例 - IT研修(xuhuhu.com)</title>
<meta charset="UTF-8">
<meta name="viewport" content="width=device-width, initial-scale=1">
<link rel="stylesheet" href="styles.css">
<script src="node_modules/core-js/client/shim.min.js"></script>
<script src="node_modules/zone.js/dist/zone.js"></script>
<script src="node_modules/reflect-metadata/Reflect.js"></script>
<script src="node_modules/systemjs/dist/system.src.js"></script>
<script src="systemjs.config.js"></script>
<script>
System.import('app').catch(function(err){ console.error(err); });
</script>
</head>
<body>
<my-app>Loading...</my-app>
</body>
</html>
這裏值得注意的地方有:
JavaScript 庫: core-js 是為老式流覽器提供的填充庫, zone.js 和 reflect-metadata 庫是 Angular 需要的,而 SystemJS 庫是用來做模組加載的。
SystemJS 的配置檔和腳本,可以導入並運行了我們剛剛在 main 檔中寫的 app 模組。
<my-app> 標籤是應用載入的地方
添加一些樣式
我們可以在 angular-quickstart 目錄的 styles.css 檔中設置我們需要的樣式:
styles.css 檔:
h1 {
color: #369;
font-family: Arial, Helvetica, sans-serif;
font-size: 250%;
}
h2, h3 {
color: #444;
font-family: Arial, Helvetica, sans-serif;
font-weight: lighter;
}
body {
margin: 2em;
}
第六步:編譯並運行應用程式
打開終端窗口,輸入以下命令:
npm start
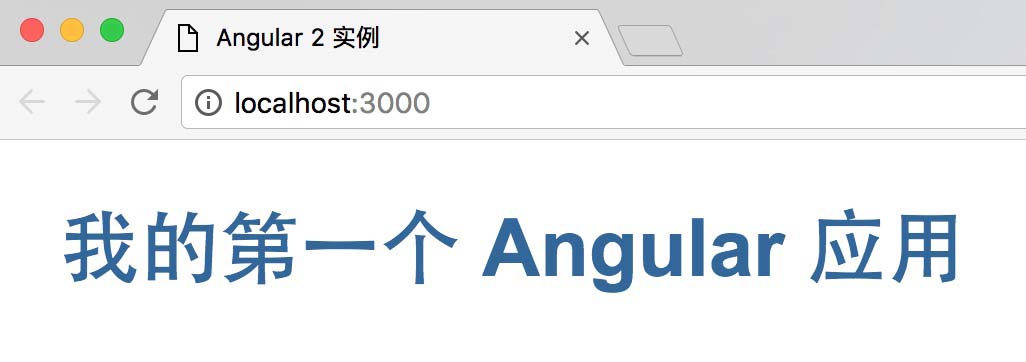
訪問 http://localhost:3000/,流覽器顯示結果為:
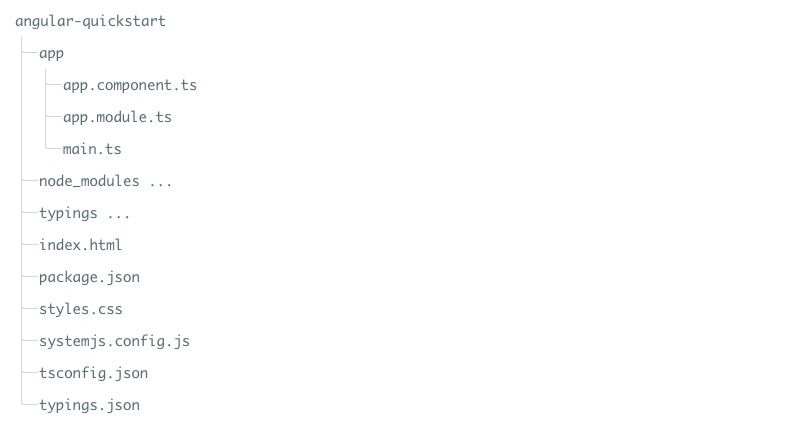
這樣我們的第一個 Angular2 的應用就算創建完成了,最終的目錄結構為:
本文所使用的源碼可以通過以下方式下載,不包含 node_modules 和 typings 目錄。
源代碼下載