在JSF中,我們可以處理如<h:commandButton>或<h:link>組件的用戶點擊事件。要註冊事件處理程式,我們可以在UI組件的actionListener屬性中傳遞託管bean方法的名稱。
或者也可以選擇實現ActionListener介面,並將實現類名稱傳遞給UI 組件的actionListener屬性。
以下代碼顯示了如何從<h:commandButton>向actionListener屬性添加用戶定義的方法。
public void updateData(ActionEvent e){
   data="Hello World";
}
使用上述方法
<h:commandButton id="submitButton"
   value="Submit" action="#{userData.showResult}"
   actionListener="#{userData.updateData}" />
</h:commandButton>
以下代碼顯示了如何實現ActionListener並使用f:actionListener標籤。
public class UserActionListener implements ActionListener{
   @Override
   public void processAction(ActionEvent arg0)
   throws AbortProcessingException {
      //access userData bean directly
      UserData userData = (UserData) FacesContext.getCurrentInstance().
         getExternalContext().getSessionMap().get("userData");
      userData.setData("Hello World");
   }
}
使用偵聽器方法 -
<h:commandButton id="submitButton1"
   value="Submit" action="#{userData.showResult}" >
   <f:actionListener type="com.zaixian.test.UserActionListener" />
</h:commandButton>
實例
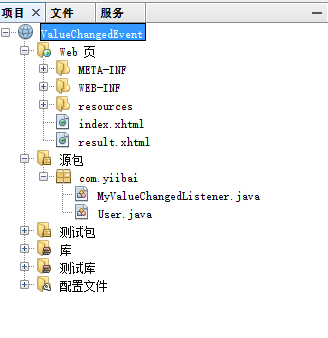
打開NetBeans,創建一個名稱為:Actionlistener 的Web專案,其結構如下所示 -
以下是檔:User.java 檔中的代碼 -
/*
 * To change this license header, choose License Headers in Project Properties.
 * To change this template file, choose Tools | Templates
 * and open the template in the editor.
 */
package com.zaixian;

/**
 *
 * @author Maxsu
 */
import javax.faces.bean.ManagedBean;
import javax.faces.bean.SessionScoped;
import javax.faces.event.ActionEvent;

@ManagedBean(name = "normal")
@SessionScoped
public class User implements java.io.Serializable {

    public String buttonId = "xuhuhu.com";

    public String getButtonId() {
        return buttonId;
    }

    public void setButtonId(String buttonId) {
        this.buttonId = buttonId;
    }

    public void printIt(ActionEvent event) {
        //Get submit button id
        buttonId = event.getComponent().getClientId();
    }

    public String outcome() {
        return "result";
    }
}
以下是檔:MyActionListener.java 檔中的代碼 -
/*
 * To change this license header, choose License Headers in Project Properties.
 * To change this template file, choose Tools | Templates
 * and open the template in the editor.
 */
package com.zaixian;

/**
 *
 * @author Maxsu
 */
import javax.faces.event.AbortProcessingException;
import javax.faces.event.ActionEvent;
import javax.faces.event.ActionListener;

public class MyActionListener implements ActionListener {

    @Override
    public void processAction(ActionEvent event)
            throws AbortProcessingException {

        System.out.println("Any use case here?");

    }

}
以下是檔:index.xhtml 檔中的代碼 -
<?xml version="1.0" encoding="UTF-8"?>
<!DOCTYPE html PUBLIC "-//W3C//DTD XHTML 1.0 Transitional//EN"
    "http://www.w3.org/TR/xhtml1/DTD/xhtml1-transitional.dtd">
<html xmlns="http://www.w3.org/1999/xhtml"
      xmlns:h="http://java.sun.com/jsf/html"
      xmlns:f="http://java.sun.com/jsf/core"
      xmlns:ui="http://java.sun.com/jsf/facelets"
      >
    <h:body>
        <h:form id="form">
            <ui:remove>
                <h:commandButton id="submitButton"
                                 value="Submit" action="#{normal.outcome}"
                                 actionListener="#{normal.printIt}" />
            </ui:remove>
            <h:commandButton id="submitButton"
                             value="Submit" action="#{normal.outcome}" >
                <f:actionListener type="com.zaixian.MyActionListener" />
            </h:commandButton>
        </h:form>
    </h:body>
</html>
以下是檔:result.xhtml 檔中的代碼 -
<?xml version="1.0" encoding="UTF-8"?>
<!DOCTYPE html PUBLIC "-//W3C//DTD XHTML 1.0 Transitional//EN"
    "http://www.w3.org/TR/xhtml1/DTD/xhtml1-transitional.dtd">
<html xmlns="http://www.w3.org/1999/xhtml"
      xmlns:h="http://java.sun.com/jsf/html"
      >
    <h:body>
        #{normal.buttonId}
    </h:body>
</html>
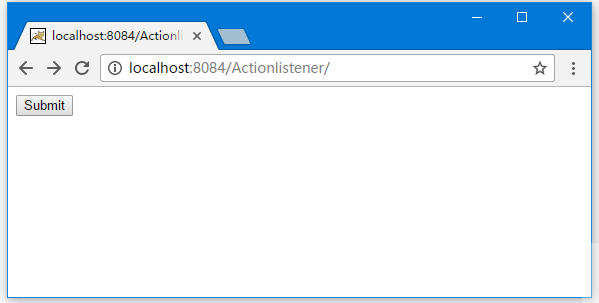
運行專案
在Actionlistener 專案上點擊右鍵,選擇 【運行】,在Tomcat啟動完成後,打開流覽器訪問以下地址:
http://localhost:8084/Actionlistener/
如果程式沒有錯誤,應該會看到如下介面 -
點擊上面的按鈕後,應該會看到如下結果 -

上一篇:
JSF值變化的事件
下一篇:
JSF Facelets技術介紹