- Spring 4.0.6.RELEASE
- Hibernate Core 4.3.6.Final
- validation-api 1.1.0.Final
- hibernate-validator 5.1.3.Final
- MySQL Server 5.6
- Maven 3
- JDK 1.7
- Tomcat 8.0.21
- Eclipse JUNO Service Release 2
- TestNG 6.9.4
- Mockito 1.10.19
- DBUnit 2.2
- H2 Database 1.4.187
現在,讓我們開始
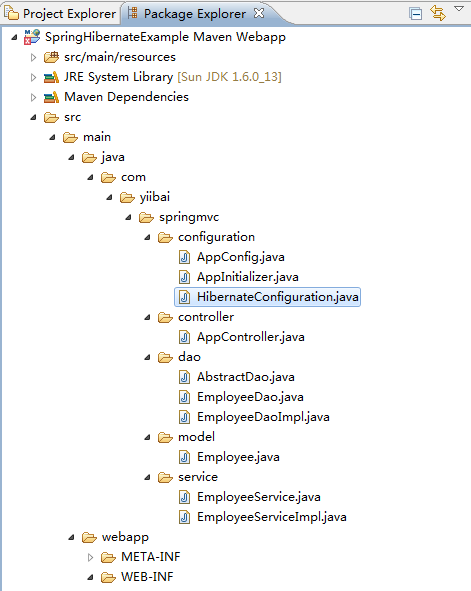
第1步:創建目錄結構
第2步:更新 pom.xml,包括所需的依賴關係
<?xml version="1.0"?>
<project xsi:schemaLocation="http://maven.apache.org/POM/4.0.0 http://maven.apache.org/xsd/maven-4.0.0.xsd"
	xmlns="http://maven.apache.org/POM/4.0.0" xmlns:xsi="http://www.w3.org/2001/XMLSchema-instance">

	<modelVersion>4.0.0</modelVersion>
	<groupId>com.zaixian.springmvc</groupId>
	<artifactId>SpringHibernateExample</artifactId>
	<packaging>war</packaging>
	<version>1.0.0</version>
	<name>SpringHibernateExample</name>

	<properties>
		<springframework.version>4.0.6.RELEASE</springframework.version>
		<hibernate.version>4.3.6.Final</hibernate.version>
		<mysql.connector.version>5.1.31</mysql.connector.version>
		<joda-time.version>2.3</joda-time.version>
		<testng.version>6.9.4</testng.version>
		<mockito.version>1.10.19</mockito.version>
		<h2.version>1.4.187</h2.version>
		<dbunit.version>2.2</dbunit.version>
	</properties>

	<dependencies>
		<!-- Spring -->
		<dependency>
			<groupId>org.springframework</groupId>
			<artifactId>spring-core</artifactId>
			<version>${springframework.version}</version>
		</dependency>
		<dependency>
			<groupId>org.springframework</groupId>
			<artifactId>spring-web</artifactId>
			<version>${springframework.version}</version>
		</dependency>
		<dependency>
			<groupId>org.springframework</groupId>
			<artifactId>spring-webmvc</artifactId>
			<version>${springframework.version}</version>
		</dependency>
		<dependency>
			<groupId>org.springframework</groupId>
			<artifactId>spring-tx</artifactId>
			<version>${springframework.version}</version>
		</dependency>
		<dependency>
			<groupId>org.springframework</groupId>
			<artifactId>spring-orm</artifactId>
			<version>${springframework.version}</version>
		</dependency>

		<!-- Hibernate -->
		<dependency>
			<groupId>org.hibernate</groupId>
			<artifactId>hibernate-core</artifactId>
			<version>${hibernate.version}</version>
		</dependency>

		<!-- jsr303 validation -->
		<dependency>
			<groupId>javax.validation</groupId>
			<artifactId>validation-api</artifactId>
			<version>1.1.0.Final</version>
		</dependency>
		<dependency>
			<groupId>org.hibernate</groupId>
			<artifactId>hibernate-validator</artifactId>
			<version>5.1.3.Final</version>
		</dependency>

		<!-- MySQL -->
		<dependency>
			<groupId>mysql</groupId>
			<artifactId>mysql-connector-java</artifactId>
			<version>${mysql.connector.version}</version>
		</dependency>

      	<!-- Joda-Time -->
		<dependency>
  			<groupId>joda-time</groupId>
  			<artifactId>joda-time</artifactId>
  			<version>${joda-time.version}</version>
  		</dependency>

		<!-- To map JodaTime with database type -->
  		<dependency>
    		<groupId>org.jadira.usertype</groupId>
    		<artifactId>usertype.core</artifactId>
    		<version>3.0.0.CR1</version>
		</dependency>

		<!-- Servlet+JSP+JSTL -->
		<dependency>
			<groupId>javax.servlet</groupId>
			<artifactId>javax.servlet-api</artifactId>
			<version>3.1.0</version>
		</dependency>
		<dependency>
			<groupId>javax.servlet.jsp</groupId>
			<artifactId>javax.servlet.jsp-api</artifactId>
			<version>2.3.1</version>
		</dependency>
		<dependency>
		    <groupId>javax.servlet</groupId>
		    <artifactId>jstl</artifactId>
		    <version>1.2</version>
		</dependency>


		<!-- Testing dependencies -->
		<dependency>
			<groupId>org.springframework</groupId>
			<artifactId>spring-test</artifactId>
			<version>${springframework.version}</version>
			<scope>test</scope>
		</dependency>
		<dependency>
			<groupId>org.testng</groupId>
			<artifactId>testng</artifactId>
			<version>${testng.version}</version>
			<scope>test</scope>
		</dependency>
		<dependency>
			<groupId>org.mockito</groupId>
			<artifactId>mockito-all</artifactId>
			<version>${mockito.version}</version>
			<scope>test</scope>
		</dependency>
		<dependency>
			<groupId>com.h2database</groupId>
			<artifactId>h2</artifactId>
			<version>${h2.version}</version>
			<scope>test</scope>
		</dependency>
		<dependency>
			<groupId>dbunit</groupId>
			<artifactId>dbunit</artifactId>
			<version>${dbunit.version}</version>
			<scope>test</scope>
		</dependency>

	</dependencies>

	<build>
		<pluginManagement>
			<plugins>
				<plugin>
					<groupId>org.apache.maven.plugins</groupId>
					<artifactId>maven-war-plugin</artifactId>
					<version>2.4</version>
					<configuration>
						<warSourceDirectory>src/main/webapp</warSourceDirectory>
						<warName>SpringHibernateExample</warName>
						<failOnMissingWebXml>false</failOnMissingWebXml>
					</configuration>
				</plugin>
			</plugins>
		</pluginManagement>
		<finalName>SpringHibernateExample</finalName>
	</build>
</project>
首先要注意這裏是 maven-war-plugin 插件聲明。由於我們使用的是全注解的配置,所以不包函 web.xml 檔在專案中,所以我們需要配置這個插件以避免 Maven 構建 war 包失敗。因為在這個例子中,我們將用一個表單來接受來自用戶的輸入,我們也需要驗證用戶的輸入。在這裏我們將選擇JSR303驗證,所以我們包括驗證,API 代表了規範,hibernate-validator它代表本規範的實現。hibernate-validator 還提供了一些它自己的注解(@Email,@NotEmpty等)不屬於規範的一部分。
伴隨著這一點,我們也包括 JSP/Servlet/Jstl 依賴關係,也將需要為使用的 servlet API和JSTL視圖在代碼中。在一般情況下,容器可能已經包含了這些庫,從而在 pom.xml 中“提供”了我們可以設置的範圍。
步驟3:配置Hibernate
com.zaixian.springmvc.configuration.HibernateConfiguration
package com.zaixian.springmvc.configuration;

import java.util.Properties;

import javax.sql.DataSource;

import org.hibernate.SessionFactory;
import org.springframework.beans.factory.annotation.Autowired;
import org.springframework.context.annotation.Bean;
import org.springframework.context.annotation.ComponentScan;
import org.springframework.context.annotation.Configuration;
import org.springframework.context.annotation.PropertySource;
import org.springframework.core.env.Environment;
import org.springframework.jdbc.datasource.DriverManagerDataSource;
import org.springframework.orm.hibernate4.HibernateTransactionManager;
import org.springframework.orm.hibernate4.LocalSessionFactoryBean;
import org.springframework.transaction.annotation.EnableTransactionManagement;

@Configuration
@EnableTransactionManagement
@ComponentScan({ "com.zaixian.springmvc.configuration" })
@PropertySource(value = { "classpath:application.properties" })
public class HibernateConfiguration {

    @Autowired
    private Environment environment;

    @Bean
    public LocalSessionFactoryBean sessionFactory() {
        LocalSessionFactoryBean sessionFactory = new LocalSessionFactoryBean();
        sessionFactory.setDataSource(dataSource());
        sessionFactory.setPackagesToScan(new String[] { "com.zaixian.springmvc.model" });
        sessionFactory.setHibernateProperties(hibernateProperties());
        return sessionFactory;
     }

    @Bean
    public DataSource dataSource() {
        DriverManagerDataSource dataSource = new DriverManagerDataSource();
        dataSource.setDriverClassName(environment.getRequiredProperty("jdbc.driverClassName"));
        dataSource.setUrl(environment.getRequiredProperty("jdbc.url"));
        dataSource.setUsername(environment.getRequiredProperty("jdbc.username"));
        dataSource.setPassword(environment.getRequiredProperty("jdbc.password"));
        return dataSource;
    }

    private Properties hibernateProperties() {
        Properties properties = new Properties();
        properties.put("hibernate.dialect", environment.getRequiredProperty("hibernate.dialect"));
        properties.put("hibernate.show_sql", environment.getRequiredProperty("hibernate.show_sql"));
        properties.put("hibernate.format_sql", environment.getRequiredProperty("hibernate.format_sql"));
        return properties;
    }

	@Bean
    @Autowired
    public HibernateTransactionManager transactionManager(SessionFactory s) {
       HibernateTransactionManager txManager = new HibernateTransactionManager();
       txManager.setSessionFactory(s);
       return txManager;
    }
}
@Configuration表示該類包含注解為 @Bean生產Bean管理是由Spring容器的一個或多個bean的方法。在我們的例子中,這個類代表hibernate配置。
@ComponentScan 相當於 context:component-scan base-package="..." 在xml檔中配置, 提供Spring在哪里尋找管理 beans/classes。
@EnableTransactionManagement 相當於 Spring’s tx:* XML 命名空間, 使Spring注解驅動事務管理能力。
@PropertySource 用於聲明一組屬性(在屬性中定義的應用程式類路徑檔)在Spring運行時 Environment, 提供了靈活性,可以在不同的應用環境的不同值。
/src/main/resources/application.properties
jdbc.driverClassName = com.mysql.jdbc.Driver
jdbc.url = jdbc:mysql://localhost:3306/zaixian
jdbc.username = root
jdbc.password = passwd123
hibernate.dialect = org.hibernate.dialect.MySQLDialect
hibernate.show_sql = true
hibernate.format_sql = true
第4步:配置Spring MVC
com.zaixian.springmvc.configuration.AppConfig
package com.zaixian.springmvc.configuration;

import org.springframework.context.MessageSource;
import org.springframework.context.annotation.Bean;
import org.springframework.context.annotation.ComponentScan;
import org.springframework.context.annotation.Configuration;
import org.springframework.context.support.ResourceBundleMessageSource;
import org.springframework.web.servlet.ViewResolver;
import org.springframework.web.servlet.config.annotation.EnableWebMvc;
import org.springframework.web.servlet.view.InternalResourceViewResolver;
import org.springframework.web.servlet.view.JstlView;

@Configuration
@EnableWebMvc
@ComponentScan(basePackages = "com.zaixian.springmvc")
public class AppConfig {

	@Bean
	public ViewResolver viewResolver() {
		InternalResourceViewResolver viewResolver = new InternalResourceViewResolver();
		viewResolver.setViewClass(JstlView.class);
		viewResolver.setPrefix("/WEB-INF/views/");
		viewResolver.setSuffix(".jsp");
		return viewResolver;
	}

	@Bean
	public MessageSource messageSource() {
	    ResourceBundleMessageSource messageSource = new ResourceBundleMessageSource();
	    messageSource.setBasename("messages");
	    return messageSource;
	}
}
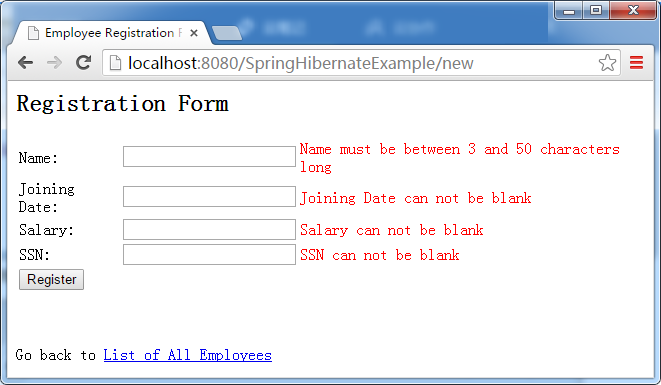
在這篇文章中,我們提交表單並驗證用戶輸入(通過JSR303注解)。在校驗失敗後,默認的錯誤消息會顯示。要通過自己的自定義覆蓋默認的[國際化]從外部消息包的消息[.properties檔],我們需要配置一個ResourceBundleMessageSource。messageSource方法有同樣的目的。請注意,以basename方法提供的參數(消息)。Spring將搜索應用程式類路徑中一個名為 messages.properties 的檔。讓我們添加的檔:
/src/main/resources/messages.properties
Size.employee.name=Name must be between {2} and {1} characters long
NotNull.employee.joiningDate=Joining Date can not be blank
NotNull.employee.salary=Salary can not be blank
Digits.employee.salary=Only numeric data with max 8 digits and with max 2 precision is allowed
NotEmpty.employee.ssn=SSN can not be blank
typeMismatch=Invalid format
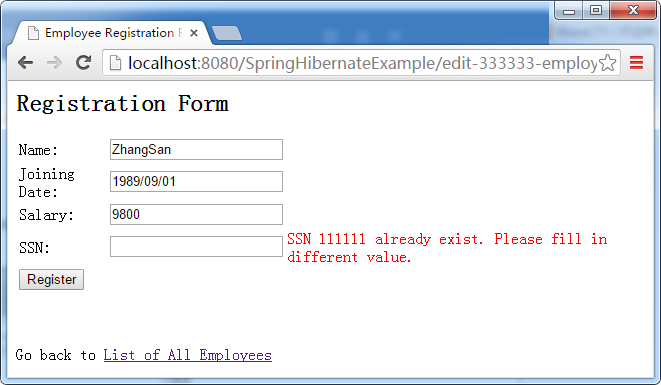
non.unique.ssn=SSN {0} already exist. Please fill in different value.
{ValidationAnnotationClass}.{modelObject}.{fieldName}
此外,根據具體注解(如@Size),你也可以用傳遞參數給這些消息{0},{1},..{i}索引。
步驟5:配置初始化器類
com.zaixian.springmvc.configuration.AppInitializer
package com.zaixian.springmvc.configuration;

import javax.servlet.ServletContext;
import javax.servlet.ServletException;
import javax.servlet.ServletRegistration;

import org.springframework.web.WebApplicationInitializer;
import org.springframework.web.context.support.AnnotationConfigWebApplicationContext;
import org.springframework.web.servlet.DispatcherServlet;

public class AppInitializer implements WebApplicationInitializer {

	public void onStartup(ServletContext container) throws ServletException {

		AnnotationConfigWebApplicationContext ctx = new AnnotationConfigWebApplicationContext();
		ctx.register(AppConfig.class);
		ctx.setServletContext(container);

		ServletRegistration.Dynamic servlet = container.addServlet(
				"dispatcher", new DispatcherServlet(ctx));

		servlet.setLoadOnStartup(1);
		servlet.addMapping("/");
	}

}
上面的內容類似於web.xml,因為我們使用的是前端控制器 DispatcherServlet 的內容,分配映射(URL模式的XML),而不是提供給Spring配置檔(spring-servlet.xml)的路徑,在這裏我們正在註冊的配置類。
更新:請注意,上面的類可以寫成更加簡潔[最佳方法],通過擴展 AbstractAnnotationConfigDispatcherServletInitializer 基類,如下所示:
package com.zaixian.springmvc.configuration;

import org.springframework.web.servlet.support.AbstractAnnotationConfigDispatcherServletInitializer;

public class AppInitializer extends AbstractAnnotationConfigDispatcherServletInitializer {

	@Override
	protected Class<?>[] getRootConfigClasses() {
		return new Class[] { AppConfig.class };
	}

	@Override
	protected Class<?>[] getServletConfigClasses() {
		return null;
	}

	@Override
	protected String[] getServletMappings() {
		return new String[] { "/" };
	}

}
第6步:添加控制器來處理請求
com.zaixian.springmvc.controller.AppController
package com.zaixian.springmvc.controller;

import java.util.List;
import java.util.Locale;

import javax.validation.Valid;

import org.springframework.beans.factory.annotation.Autowired;
import org.springframework.context.MessageSource;
import org.springframework.stereotype.Controller;
import org.springframework.ui.ModelMap;
import org.springframework.validation.BindingResult;
import org.springframework.validation.FieldError;
import org.springframework.web.bind.annotation.PathVariable;
import org.springframework.web.bind.annotation.RequestMapping;
import org.springframework.web.bind.annotation.RequestMethod;

import com.zaixian.springmvc.model.Employee;
import com.zaixian.springmvc.service.EmployeeService;

@Controller
@RequestMapping("/")
public class AppController {

	@Autowired
	EmployeeService service;

	@Autowired
	MessageSource messageSource;

	/*
	 * This method will list all existing employees.
	 */
	@RequestMapping(value = { "/", "/list" }, method = RequestMethod.GET)
	public String listEmployees(ModelMap model) {

		List<Employee> employees = service.findAllEmployees();
		model.addAttribute("employees", employees);
		return "allemployees";
	}

	/*
	 * This method will provide the medium to add a new employee.
	 */
	@RequestMapping(value = { "/new" }, method = RequestMethod.GET)
	public String newEmployee(ModelMap model) {
		Employee employee = new Employee();
		model.addAttribute("employee", employee);
		model.addAttribute("edit", false);
		return "registration";
	}

	/*
	 * This method will be called on form submission, handling POST request for
	 * saving employee in database. It also validates the user input
	 */
	@RequestMapping(value = { "/new" }, method = RequestMethod.POST)
	public String saveEmployee(@Valid Employee employee, BindingResult result,
			ModelMap model) {

		if (result.hasErrors()) {
			return "registration";
		}

		/*
		 * Preferred way to achieve uniqueness of field [ssn] should be implementing custom @Unique annotation
		 * and applying it on field [ssn] of Model class [Employee].
		 *
		 * Below mentioned peace of code [if block] is to demonstrate that you can fill custom errors outside the validation
		 * framework as well while still using internationalized messages.
		 *
		 */
		if(!service.isEmployeeSsnUnique(employee.getId(), employee.getSsn())){
			FieldError ssnError =new FieldError("employee","ssn",messageSource.getMessage("non.unique.ssn", new String[]{employee.getSsn()}, Locale.getDefault()));
		    result.addError(ssnError);
			return "registration";
		}

		service.saveEmployee(employee);

		model.addAttribute("success", "Employee " + employee.getName() + " registered successfully");
		return "success";
	}


	/*
	 * This method will provide the medium to update an existing employee.
	 */
	@RequestMapping(value = { "/edit-{ssn}-employee" }, method = RequestMethod.GET)
	public String editEmployee(@PathVariable String ssn, ModelMap model) {
		Employee employee = service.findEmployeeBySsn(ssn);
		model.addAttribute("employee", employee);
		model.addAttribute("edit", true);
		return "registration";
	}

	/*
	 * This method will be called on form submission, handling POST request for
	 * updating employee in database. It also validates the user input
	 */
	@RequestMapping(value = { "/edit-{ssn}-employee" }, method = RequestMethod.POST)
	public String updateEmployee(@Valid Employee employee, BindingResult result,
			ModelMap model, @PathVariable String ssn) {

		if (result.hasErrors()) {
			return "registration";
		}

		if(!service.isEmployeeSsnUnique(employee.getId(), employee.getSsn())){
			FieldError ssnError =new FieldError("employee","ssn",messageSource.getMessage("non.unique.ssn", new String[]{employee.getSsn()}, Locale.getDefault()));
		    result.addError(ssnError);
			return "registration";
		}

		service.updateEmployee(employee);

		model.addAttribute("success", "Employee " + employee.getName()	+ " updated successfully");
		return "success";
	}


	/*
	 * This method will delete an employee by it's SSN value.
	 */
	@RequestMapping(value = { "/delete-{ssn}-employee" }, method = RequestMethod.GET)
	public String deleteEmployee(@PathVariable String ssn) {
		service.deleteEmployeeBySsn(ssn);
		return "redirect:/list";
	}

}
這是一個非常直接的基於Spring的控制器。 @Controller表明這個類是一個控制器在處理與模式映射@RequestMapping請求。這裏用“/”,它被作為默認的控制器。
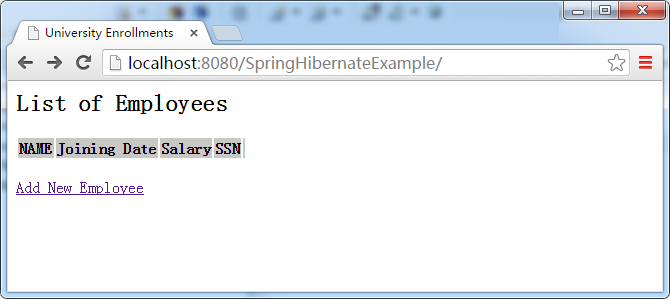
listEmployees方法標注了@ RequestMethod.GET,同時處理默認的網址 “/” 和 ‘/list’。它充當處理應用初始頁面,顯示現有雇員的列表。
newEmployee方法處理新員工註冊頁面的GET請求, 表示通過模型 Employee 對象支持頁面。
方法 saveEmployee 被注解為@ RequestMethod.POST,並且將處理新員工登記表單提交 POST 請求 (‘/new’)。注間這個方法的參數和它們的順序。
@Valid要求Spring來驗證相關的對象(Employee)。 BindingResult包含此驗證,並可能在此驗證過程中發生任何錯誤的結果。請注意,BindingResult必須出現在驗證對象,否則Spring將無法驗證並且拋出一個異常。 如果驗證失敗,自定義錯誤資訊(因為我們已經配置在步驟4)中顯示。
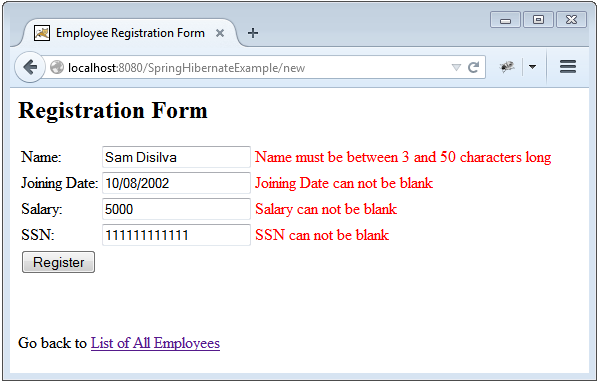
我們還包括代碼檢查SSN唯一性,因為它聲明要在資料庫中具有唯一必。保存/更新員工之前要檢查,如果SSN是否獨一無二。如果沒有,我們生成驗證錯誤和重定向到註冊頁面。 這個代碼展示出一種方式來填充在自定義錯誤校驗框架之外,同時仍使用國際化的資訊。
第7步:添加DAO層
com.zaixian.springmvc.dao.AbstractDao
package com.zaixian.springmvc.dao;

import java.io.Serializable;

import java.lang.reflect.ParameterizedType;

import org.hibernate.Criteria;
import org.hibernate.Session;
import org.hibernate.SessionFactory;
import org.springframework.beans.factory.annotation.Autowired;

public abstract class AbstractDao<PK extends Serializable, T> {

	private final Class<T> persistentClass;

	@SuppressWarnings("unchecked")
	public AbstractDao(){
		this.persistentClass =(Class<T>) ((ParameterizedType) this.getClass().getGenericSuperclass()).getActualTypeArguments()[1];
	}

	@Autowired
	private SessionFactory sessionFactory;

	protected Session getSession(){
		return sessionFactory.getCurrentSession();
	}

	@SuppressWarnings("unchecked")
	public T getByKey(PK key) {
		return (T) getSession().get(persistentClass, key);
	}

	public void persist(T entity) {
		getSession().persist(entity);
	}

	public void delete(T entity) {
		getSession().delete(entity);
	}

	protected Criteria createEntityCriteria(){
		return getSession().createCriteria(persistentClass);
	}

}
這個通用類是所有的DAO實現類的基類。它提供包裝方法也是常見的hibernate 操作。
com.zaixian.springmvc.dao.EmployeeDao
package com.zaixian.springmvc.dao;

import java.util.List;

import com.zaixian.springmvc.model.Employee;

public interface EmployeeDao {

	Employee findById(int id);

	void saveEmployee(Employee employee);

	void deleteEmployeeBySsn(String ssn);

	List<Employee> findAllEmployees();

	Employee findEmployeeBySsn(String ssn);

}
com.zaixian.springmvc.dao.EmployeeDaoImpl
package com.zaixian.springmvc.dao;

import java.util.List;

import org.hibernate.Criteria;
import org.hibernate.Query;
import org.hibernate.criterion.Restrictions;
import org.springframework.stereotype.Repository;

import com.zaixian.springmvc.model.Employee;

@Repository("employeeDao")
public class EmployeeDaoImpl extends AbstractDao<Integer, Employee> implements EmployeeDao {

	public Employee findById(int id) {
		return getByKey(id);
	}

	public void saveEmployee(Employee employee) {
		persist(employee);
	}

	public void deleteEmployeeBySsn(String ssn) {
		Query query = getSession().createSQLQuery("delete from Employee where ssn = :ssn");
		query.setString("ssn", ssn);
		query.executeUpdate();
	}

	@SuppressWarnings("unchecked")
	public List<Employee> findAllEmployees() {
		Criteria criteria = createEntityCriteria();
		return (List<Employee>) criteria.list();
	}

	public Employee findEmployeeBySsn(String ssn) {
		Criteria criteria = createEntityCriteria();
		criteria.add(Restrictions.eq("ssn", ssn));
		return (Employee) criteria.uniqueResult();
	}
}
第8步:添加服務層
com.zaixian.springmvc.service.EmployeeService
package com.zaixian.springmvc.service;

import java.util.List;

import com.zaixian.springmvc.model.Employee;

public interface EmployeeService {

	Employee findById(int id);

	void saveEmployee(Employee employee);

	void updateEmployee(Employee employee);

	void deleteEmployeeBySsn(String ssn);

	List<Employee> findAllEmployees();

	Employee findEmployeeBySsn(String ssn);

	boolean isEmployeeSsnUnique(Integer id, String ssn);

}
com.zaixian.springmvc.service.EmployeeServiceImpl
package com.zaixian.springmvc.service;

import java.util.List;

import org.springframework.beans.factory.annotation.Autowired;
import org.springframework.stereotype.Service;
import org.springframework.transaction.annotation.Transactional;

import com.zaixian.springmvc.dao.EmployeeDao;
import com.zaixian.springmvc.model.Employee;

@Service("employeeService")
@Transactional
public class EmployeeServiceImpl implements EmployeeService {

	@Autowired
	private EmployeeDao dao;

	public Employee findById(int id) {
		return dao.findById(id);
	}

	public void saveEmployee(Employee employee) {
		dao.saveEmployee(employee);
	}

	/*
	 * Since the method is running with Transaction, No need to call hibernate update explicitly.
	 * Just fetch the entity from db and update it with proper values within transaction.
	 * It will be updated in db once transaction ends.
	 */
	public void updateEmployee(Employee employee) {
		Employee entity = dao.findById(employee.getId());
		if(entity!=null){
			entity.setName(employee.getName());
			entity.setJoiningDate(employee.getJoiningDate());
			entity.setSalary(employee.getSalary());
			entity.setSsn(employee.getSsn());
		}
	}

	public void deleteEmployeeBySsn(String ssn) {
		dao.deleteEmployeeBySsn(ssn);
	}

	public List<Employee> findAllEmployees() {
		return dao.findAllEmployees();
	}

	public Employee findEmployeeBySsn(String ssn) {
		return dao.findEmployeeBySsn(ssn);
	}

	public boolean isEmployeeSsnUnique(Integer id, String ssn) {
		Employee employee = findEmployeeBySsn(ssn);
		return ( employee == null || ((id != null) && (employee.getId() == id)));
	}

}
上面最有趣的部分是 @Transactional 它開始在每個方法啟動一個事務,並提交其上的每個方法退出(或回滾,如果方法失敗,會發生是一個錯誤)。 注意,因為該事務是在方法範圍,和內部的方法,我們將使用DAO,DAO方法將在同一事務內執行。
第9步:創建域實體類(POJO)
com.zaixian.springmvc.model.Employee
package com.zaixian.springmvc.model;

import java.math.BigDecimal;

import javax.persistence.Column;
import javax.persistence.Entity;
import javax.persistence.GeneratedValue;
import javax.persistence.GenerationType;
import javax.persistence.Id;
import javax.persistence.Table;
import javax.validation.constraints.Digits;
import javax.validation.constraints.NotNull;
import javax.validation.constraints.Size;

import org.hibernate.annotations.Type;
import org.hibernate.validator.constraints.NotEmpty;
import org.joda.time.LocalDate;
import org.springframework.format.annotation.DateTimeFormat;

@Entity
@Table(name="EMPLOYEE")
public class Employee {

	@Id
	@GeneratedValue(strategy = GenerationType.IDENTITY)
	private int id;

	@Size(min=3, max=50)
	@Column(name = "NAME", nullable = false)
	private String name;

	@NotNull
	@DateTimeFormat(pattern="dd/MM/yyyy")
	@Column(name = "JOINING_DATE", nullable = false)
	@Type(type="org.jadira.usertype.dateandtime.joda.PersistentLocalDate")
	private LocalDate joiningDate;

	@NotNull
	@Digits(integer=8, fraction=2)
	@Column(name = "SALARY", nullable = false)
	private BigDecimal salary;

	@NotEmpty
	@Column(name = "SSN", unique=true, nullable = false)
	private String ssn;

	public int getId() {
		return id;
	}

	public void setId(int id) {
		this.id = id;
	}

	public String getName() {
		return name;
	}

	public void setName(String name) {
		this.name = name;
	}

	public LocalDate getJoiningDate() {
		return joiningDate;
	}

	public void setJoiningDate(LocalDate joiningDate) {
		this.joiningDate = joiningDate;
	}

	public BigDecimal getSalary() {
		return salary;
	}

	public void setSalary(BigDecimal salary) {
		this.salary = salary;
	}

	public String getSsn() {
		return ssn;
	}

	public void setSsn(String ssn) {
		this.ssn = ssn;
	}

	@Override
	public int hashCode() {
		final int prime = 31;
		int result = 1;
		result = prime * result + id;
		result = prime * result + ((ssn == null) ? 0 : ssn.hashCode());
		return result;
	}

	@Override
	public boolean equals(Object obj) {
		if (this == obj)
			return true;
		if (obj == null)
			return false;
		if (!(obj instanceof Employee))
			return false;
		Employee other = (Employee) obj;
		if (id != other.id)
			return false;
		if (ssn == null) {
			if (other.ssn != null)
				return false;
		} else if (!ssn.equals(other.ssn))
			return false;
		return true;
	}

	@Override
	public String toString() {
		return "Employee [id=" + id + ", name=" + name + ", joiningDate="
				+ joiningDate + ", salary=" + salary + ", ssn=" + ssn + "]";
	}

}
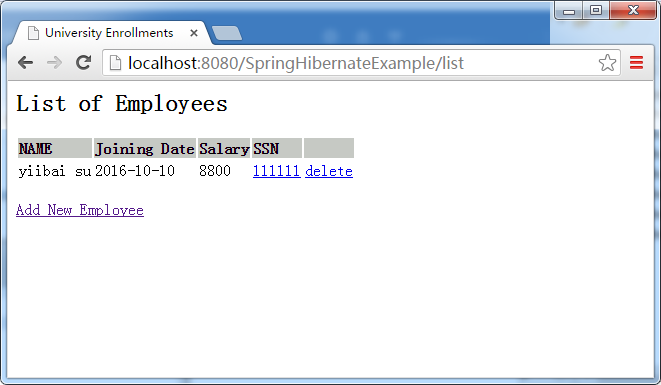
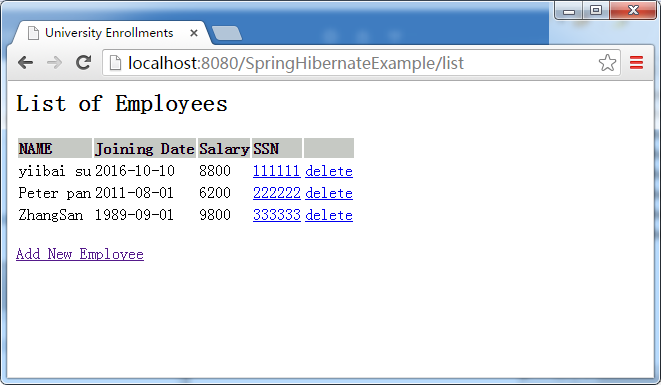
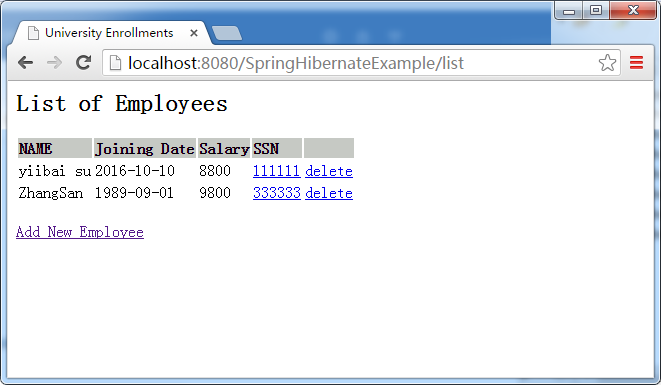
第10步:添加視圖/JSP
WEB-INF/views/allemployees.jsp [主頁包含所有現有員工列表]
<%@ page language="java" contentType="text/html; charset=utf-8"
    pageEncoding="uft-8"%>
<%@ taglib prefix="c" uri="http://java.sun.com/jsp/jstl/core" %>
<html>
<head>
	<meta http-equiv="Content-Type" content="text/html; charset=utf-8">
	<title>University Enrollments</title>

	<style>
		tr:first-child{
			font-weight: bold;
			background-color: #C6C9C4;
		}
	</style>

</head>


<body>
	<h2>List of Employees</h2>
	<table>
		<tr>
			<td>NAME</td><td>Joining Date</td><td>Salary</td><td>SSN</td><td></td>
		</tr>
		<c:forEach items="${employees}" var="employee">
			<tr>
			<td>${employee.name}</td>
			<td>${employee.joiningDate}</td>
			<td>${employee.salary}</td>
			<td><a href="<c:url value='/edit-${employee.ssn}-employee' />">${employee.ssn}</a></td>
			<td><a href="<c:url value='/delete-${employee.ssn}-employee' />">delete</a></td>
			</tr>
		</c:forEach>
	</table>
	<br/>
	<a href="<c:url value='/new' />">Add New Employee</a>
</body>
</html>
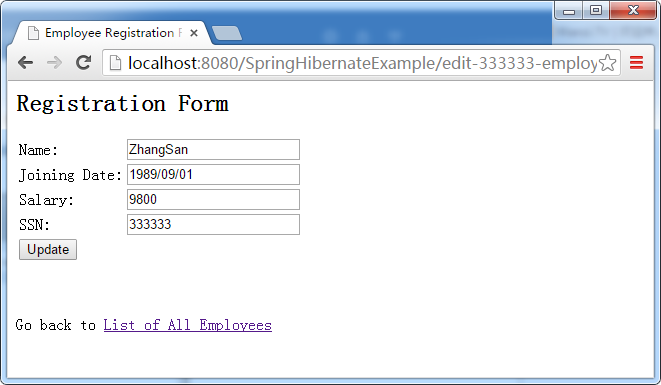
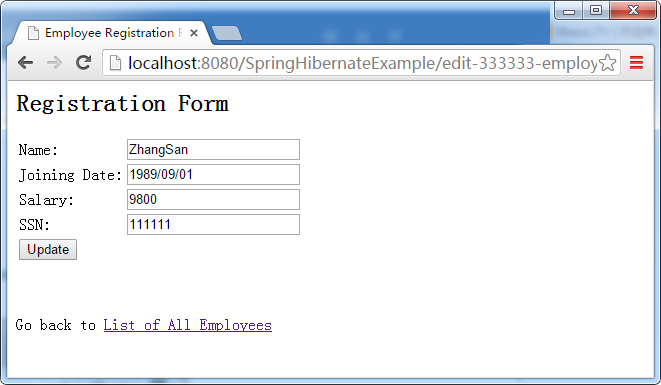
WEB-INF/views/registration.jsp [註冊頁面用來創建和保存在資料庫中的新員工]
<%@ page language="java" contentType="text/html; charset=ISO-8859-1"
    pageEncoding="ISO-8859-1"%>
<%@ taglib prefix="form" uri="http://www.springframework.org/tags/form"%>
<%@ taglib prefix="c" uri="http://java.sun.com/jsp/jstl/core" %>

<html>

<head>
	<meta http-equiv="Content-Type" content="text/html; charset=ISO-8859-1">
	<title>Employee Registration Form</title>

<style>

	.error {
		color: #ff0000;
	}
</style>

</head>

<body>

	<h2>Registration Form</h2>

	<form:form method="POST" modelAttribute="employee">
		<form:input type="hidden" path="id" id="id"/>
		<table>
			<tr>
				<td><label for="name">Name: </label> </td>
				<td><form:input path="name" id="name"/></td>
				<td><form:errors path="name" cssClass="error"/></td>
		    </tr>

			<tr>
				<td><label for="joiningDate">Joining Date: </label> </td>
				<td><form:input path="joiningDate" id="joiningDate"/></td>
				<td><form:errors path="joiningDate" cssClass="error"/></td>
		    </tr>

			<tr>
				<td><label for="salary">Salary: </label> </td>
				<td><form:input path="salary" id="salary"/></td>
				<td><form:errors path="salary" cssClass="error"/></td>
		    </tr>

			<tr>
				<td><label for="ssn">SSN: </label> </td>
				<td><form:input path="ssn" id="ssn"/></td>
				<td><form:errors path="ssn" cssClass="error"/></td>
		    </tr>

			<tr>
				<td colspan="3">
					<c:choose>
						<c:when test="${edit}">
							<input type="submit" value="Update"/>
						</c:when>
						<c:otherwise>
							<input type="submit" value="Register"/>
						</c:otherwise>
					</c:choose>
				</td>
			</tr>
		</table>
	</form:form>
	<br/>
	<br/>
	Go back to <a href="<c:url value='/list' />">List of All Employees</a>
</body>
</html>
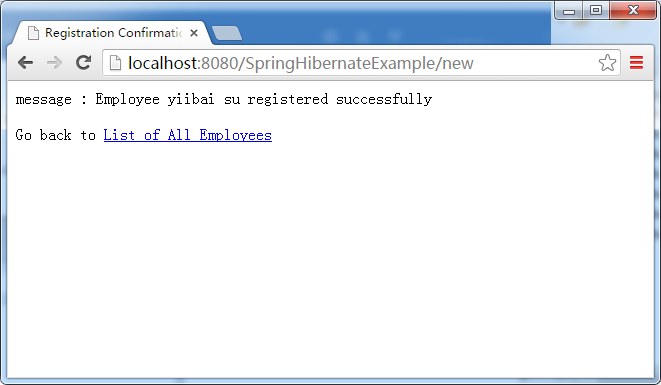
WEB-INF/views/success.jsp [包括成功頁面新員工創建一個確認,並鏈接回員工列表]
<%@ page language="java" contentType="text/html; charset=utf-8"
    pageEncoding="utf-8"%>
<%@ taglib prefix="c" uri="http://java.sun.com/jsp/jstl/core" %>

<html>
<head>
<meta http-equiv="Content-Type" content="text/html; charset=utf-8">
<title>Registration Confirmation Page</title>
</head>
<body>
	message : ${success}
	<br/>
	<br/>
	Go back to <a href="<c:url value='/list' />">List of All Employees</a>

</body>

</html>
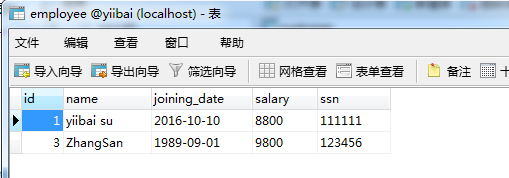
第11步:在資料庫創建模式
CREATE TABLE EMPLOYEE(
	id INT NOT NULL auto_increment,
	name VARCHAR(50) NOT NULL,
	joining_date DATE NOT NULL,
	salary DOUBLE NOT NULL,
	ssn VARCHAR(30) NOT NULL UNIQUE,
	PRIMARY KEY (id)
);
第12步:構建,部署和運行應用程式
現在構建(參考提到的前面Eclipse教學)或通過Maven的命令行( mvn clean install). 部署War到Servlet3.0容器。
打開流覽器,流覽: http://localhost:8080/SpringHibernateExample/

到這裏,整個教程完成,包教不包會!