在本章中,我們將討論和學習如何在JSP中的檔上傳。 JSP可以與HTML表單標籤一起使用,以允許用戶將檔上傳到伺服器。上傳的檔可以是文本檔或二進位檔或圖像檔,也可以是任何文檔。
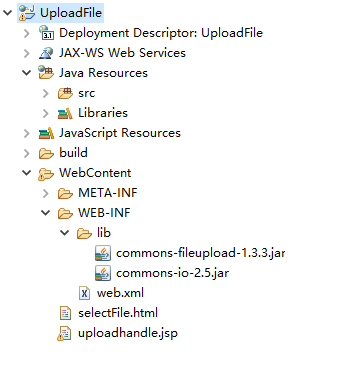
為了方便演示,首先打開Eclipse創建一個動態Web專案:UploadFile ,其目錄結構如下所示 -
創建檔上傳表單
現在來看看如何創建一個檔上傳表單。 以下HTML代碼創建一個上傳器表單。 以下是要注意的重點 -
- 表單中的
method屬性應設置為POST方法,不能使用GET方法。 - 表單中的
enctype屬性應設置為multipart/form-data。 - 表單中的
action屬性應該設置為一個JSP檔,它將處理後端伺服器上的檔上傳。 以下示例 - 使用uploadhandle.jsp程式處理上傳檔。
要上傳單個檔,應該在單個<input ... />標籤中指定使用type ="file"屬性。 要允許多個檔上傳,請將name屬性包含多個具有不同值的輸入標記。流覽器將流覽按鈕與每個流覽器相關聯。
檔:selectFile.html檔代碼如下 -
<!DOCTYPE html>
<html>
<head>
<meta charset="UTF-8">
<title>檔上傳示例</title>
</head>
<body>
    <div style="margin: auto; width: 80%;">
        <h3>檔上傳示例</h3>
        選擇要上傳的檔:
        <form action="uploadhandle.jsp" method="post" enctype="multipart/form-data">
            <input type="file" name="file" size="50" /><input
                type="submit" value="提交上傳" />
        </form>
    </div>
</body>
</html>
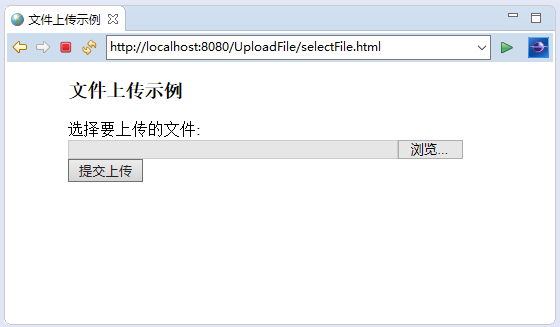
這將顯示以下結果。現在可以從本地電腦選擇一個檔,並且當用戶單擊“上傳檔”時,表單將隨所選檔一起提交 -
注意 - 上面的表單只是虛擬表單,不起作用,要處理上傳還需要編寫JSP相關處理檔上傳的程式。
後端JSP腳本
現在定義一個存儲上傳檔的位置。可以在程式中對此進行硬編碼,也可以使用外部配置(如web.xml中的context-param元素)添加此目錄名稱,如下所示:
以下是uploadFile.jsp的源代碼。這可以一次處理多個檔的上傳。 在繼續上傳檔之前,需要考慮以下幾點:
- 以下示例依懶於
FileUpload類庫; 確保類路徑中有最新版本的commons-fileupload.x.x.jar檔(可以從 http://commons.apache.org/fileupload/ 下載)。 FileUpload類庫依懶於Commons IO;確保類路徑中有最新版本的commons-io-x.x.jar檔(可以從 http://commons.apache.org/io/ 下載)。- 在測試以下示例時,應該將上傳的檔大小小於
maxFileSize,否則檔將不會被上傳。 - 這個專案中是將檔上傳到專案部署的目錄下,但您可配置並創建目錄c:\temp和c:\apache-tomcat8.5.29\webapps\data或指定到其位置。
檔:uploadhandle.jsp 的代碼實現如下 -
<%@ page language="java" contentType="text/html; charset=UTF-8"
    pageEncoding="UTF-8"%>
<%@ page import="java.io.*,java.util.*, javax.servlet.*"%>
<%@ page import="javax.servlet.http.*"%>
<%@ page import="org.apache.commons.fileupload.*"%>
<%@ page import="org.apache.commons.fileupload.disk.*"%>
<%@ page import="org.apache.commons.fileupload.servlet.*"%>
<%@ page import="org.apache.commons.io.output.*"%>

<%
    File file;
    int maxFileSize = 5000 * 1024;
    int maxMemSize = 5000 * 1024;
    ServletContext context = pageContext.getServletContext();
    //String filePath = context.getInitParameter("file-upload");
    String filePath = request.getSession().getServletContext().getRealPath("");
    //String filePath = request.getContextPath();
    System.out.println("filePath => " + filePath);
    // Verify the content type
    String contentType = request.getContentType();

    if (contentType == null) {
        System.out.println("contentType => " + contentType);
        contentType = "";
    }
    if ((contentType.indexOf("multipart/form-data") >= 0)) {
        DiskFileItemFactory factory = new DiskFileItemFactory();
        // maximum size that will be stored in memory
        factory.setSizeThreshold(maxMemSize);

        // Location to save data that is larger than maxMemSize.
        factory.setRepository(new File("c:\\temp"));

        // Create a new file upload handler
        ServletFileUpload upload = new ServletFileUpload(factory);

        // maximum file size to be uploaded.
        upload.setSizeMax(maxFileSize);

        try {
            // Parse the request to get file items.
            List fileItems = upload.parseRequest(request);

            // Process the uploaded file items
            Iterator i = fileItems.iterator();

            out.println("<html>");
            out.println("<head>");
            out.println("<title>JSP File upload</title>");
            out.println("</head>");
            out.println("<body>");

            while (i.hasNext()) {
                FileItem fi = (FileItem) i.next();
                if (!fi.isFormField()) {
                    // Get the uploaded file parameters
                    String fieldName = fi.getFieldName();
                    String fileName = fi.getName();
                    boolean isInMemory = fi.isInMemory();
                    long sizeInBytes = fi.getSize();

                    // Write the file
                    if (fileName.lastIndexOf("\\") >= 0) {
                        file = new File(filePath + fileName.substring(fileName.lastIndexOf("\\")));
                    } else {
                        file = new File(filePath + fileName.substring(fileName.lastIndexOf("\\") + 1));
                    }
                    fi.write(file);
                    out.println("Uploaded Filename: " + filePath + fileName + "<br>");
                }
            }
            out.println("</body>");
            out.println("</html>");
        } catch (Exception ex) {
            System.out.println(ex);
        }
    } else {
        out.println("<html>");
        out.println("<head>");
        out.println("<title>Servlet upload</title>");
        out.println("</head>");
        out.println("<body>");
        out.println("<p>No file uploaded</p>");
        out.println("</body>");
        out.println("</html>");
    }
%>
現在嘗試使用上面創建的HTML表單上傳檔。部署專案後,打開流覽器訪問URL: http://localhost:8080/UploadFile/selectFile.html 時將顯示以下結果。
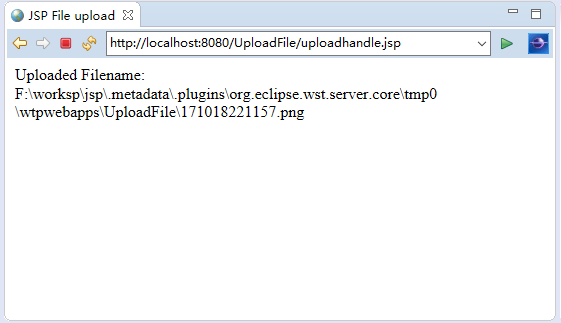
如果編寫的JSP腳本工作正常,選擇的檔應該上傳到專案的根目錄中。
上一篇:
JSP會話Session跟蹤
下一篇:
JSP處理日期