到目前為止,我們學習過如何使用<aop:config>或<aop:aspectj-autoproxy>聲明方面。也可以通過編程方式創建代理,並使用代理對象以編程方式調用方面。
語法
//Create object to be proxied
Student student = new Student();
//Create the Proxy Factory
AspectJProxyFactory proxyFactory = new AspectJProxyFactory(student);
//Add Aspect class to the factory
proxyFactory.addAspect(Logging.class);
//Get the proxy object
Student proxyStudent = proxyFactory.getProxy();
//Invoke the proxied method.
proxyStudent.getAge();
在上面的語法示例中 -
AspectJProxyFactory- 用於創建代理對象的工廠類。Logging.class- 包含通知的方面類Student- 將被通知的業務類。
要瞭解上面提到與代理相關的概念,我們寫一個Spring AOP基於注解的應用例子,它將使用基於注解配置實現通知。打開並使用Eclipse IDE,並按照以下步驟創建一個Spring應用程式:
- 更新在Spring AOP應用實例中創建過的
Student專案。 - 更新
bean配置並運行應用程式,如下所述。
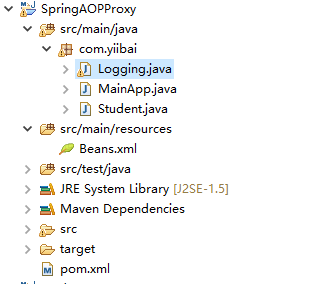
整個專案的目錄結構如下所示 -
下麵是Logging.java檔的內容。 這實際上是一個Aspect模組的樣本,它定義了在各個點被調用的方法。
package com.zaixian;

import org.aspectj.lang.annotation.Aspect;
import org.aspectj.lang.annotation.Pointcut;
import org.aspectj.lang.annotation.Before;

@Aspect
public class Logging {

   /** Following is the definition for a pointcut to select
    *  all the methods available. So advice will be called
    *  for all the methods.
    */
   @Pointcut("execution(* com.zaixian.Student.getAge(..))")
   private void selectGetAge(){}

   /**
    * This is the method which I would like to execute
    * before a selected method execution.
    */
   @Before("selectGetAge()")
   public void beforeAdvice(){
      System.out.println("[beforeAdvice] Going to setup student profile.");
   }
}
以下是Student.java檔的內容:
package com.zaixian;

public class Student {
   private Integer age;

   public void setAge(Integer age) {
      this.age = age;
   }
   public Integer getAge() {
      System.out.println("Age : " + age );
      return age;
   }
}
以下是MainApp.java檔的內容:
package com.zaixian;

import org.springframework.context.ApplicationContext;
import org.springframework.context.support.ClassPathXmlApplicationContext;
import org.springframework.aop.aspectj.annotation.AspectJProxyFactory;

public class MainApp {
   public static void main(String[] args) {
      ApplicationContext context =
             new ClassPathXmlApplicationContext("Beans.xml");

      Student student = (Student) context.getBean("student");

      //Create the Proxy Factory
      AspectJProxyFactory proxyFactory = new AspectJProxyFactory(student);

      //Add Aspect class to the factory
      proxyFactory.addAspect(Logging.class);

      //Get the proxy object
      Student proxyStudent = proxyFactory.getProxy();

      //Invoke the proxied method.
      proxyStudent.getAge();

   }
}
以下是配置檔Beans.xml檔的內容:
<?xml version="1.0" encoding="UTF-8"?>
<beans xmlns="http://www.springframework.org/schema/beans"
    xmlns:xsi="http://www.w3.org/2001/XMLSchema-instance"
    xmlns:aop="http://www.springframework.org/schema/aop"
    xsi:schemaLocation="http://www.springframework.org/schema/beans
    http://www.springframework.org/schema/beans/spring-beans-3.0.xsd
    http://www.springframework.org/schema/aop
    http://www.springframework.org/schema/aop/spring-aop-3.0.xsd ">

   <!-- Definition for student bean -->
   <bean id="student" class="com.zaixian.Student">
      <property name="age"  value="26"/>
   </bean>

   <!-- Definition for logging aspect -->
   <bean id="logging" class="com.zaixian.Logging"/>

</beans>
運行專案
完成創建源代碼和配置檔後,運行應用程式。右鍵單擊應用程式中的MainApp.java,並使用運行方式作為Java應用程式命令。 如果您的應用程式一切正常,這將列印以下消息:
[beforeAdvice] Going to setup student profile.
Age : 26
上一篇:
Spring AOP基於注解的Around通知
下一篇:
Spring AOP自定義注解