注釋表示元數據。 如果使用注釋,則不需要部署描述符(web.xml檔)。但是應該在tomcat7以上版本中部署運行,tomcat7之前的版本是不支持注解的。 @WebServlet注釋用於將servlet映射到指定的名稱,這是Servlet3的特性,所以在創建專案時要指定Servlet的版本為3.0以上。
在前面幾個專案示例中,我們已經使用過了 @WebServlet注釋,如:
使用注釋的簡單servlet示例
這個示例中演示如何使用帶有注釋的servlet。
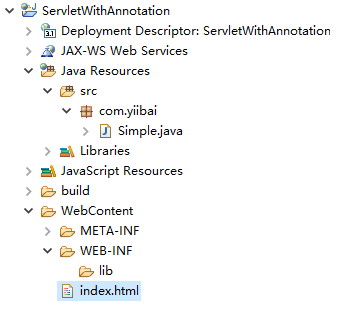
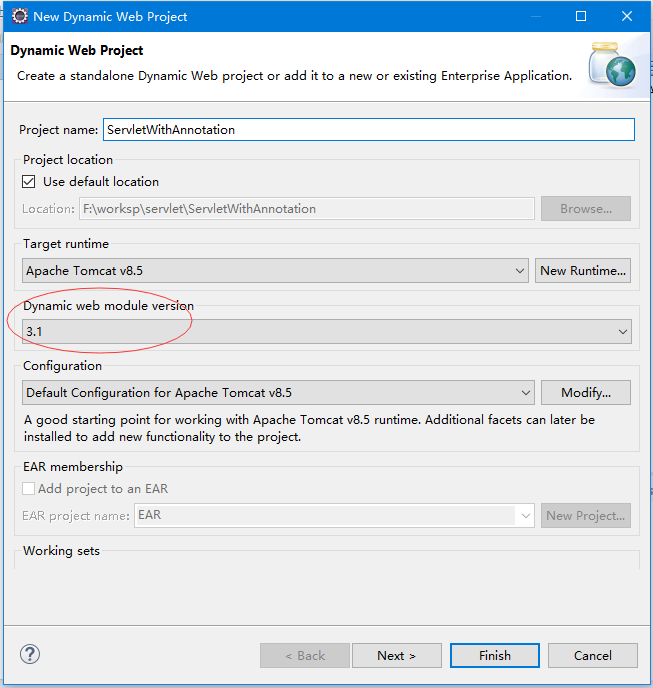
打開Eclipse,創建一個動態Web專案:ServletWithAnnotation,其完整的目錄結構如下所示 -
注意:創建專案選擇Dynamic web module version的版本是:3.0以上。
以下是這個專案中的幾個主要的代碼檔。
檔:index.html -
<!DOCTYPE html>
<html>
<head>
<meta charset="UTF-8">
<title>Servlet注解實現模式</title>
</head>
<body>
    <div style="text-align:center;">
        <a href="Simple">查看Servlet注解示例</a>
    </div>
</body>
</html>
檔:Sample.java -
package com.zaixian;

import java.io.IOException;
import java.io.PrintWriter;

import javax.servlet.ServletException;
import javax.servlet.annotation.WebServlet;
import javax.servlet.http.HttpServlet;
import javax.servlet.http.HttpServletRequest;
import javax.servlet.http.HttpServletResponse;

/**
 * Servlet implementation class Simple
 */
@WebServlet("/Simple")
public class Simple extends HttpServlet {
    private static final long serialVersionUID = 1L;

    protected void doGet(HttpServletRequest request, HttpServletResponse response)
            throws ServletException, IOException {

        response.setCharacterEncoding("UTF-8");
        response.setContentType("text/html;charset=UTF-8");
        request.setCharacterEncoding("UTF-8");
        PrintWriter out = response.getWriter();

        out.print("<html><body>");
        out.print("<div style='text-align:center;'><h3>Hello Servlet</h3>");
        out.print("<p>這是使用Servlet注解實現模式URL映射的配置示例</p></div>");
        out.print("</body></html>");
    }
}
注意: 不需要配置
web.xml
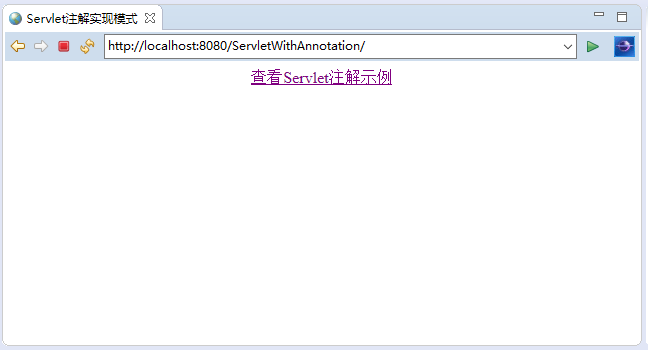
在編寫上面代碼後,部署此Web應用程式(在專案名稱上點擊右鍵->”Run On Server…”),打開流覽器訪問URL: http://localhost:8080/ServletWithAnnotation/ ,如果沒有錯誤,應該會看到以下結果 -
點擊鏈接,顯示結果如下 -

上一篇:
Servlet ServletOutputStream類
下一篇:
Servlet註冊表單示例