工具欄的使用
我們可以使用工具欄修改視圖元素。
如,郵件應用程式裏的收件箱欄中有刪除、分享、答復等等。如下所示:
![]()
重要的屬性
- barStyle
- items
添加自定義方法 addToolbar
-(void)addToolbar
{
    UIBarButtonItem *spaceItem = [[UIBarButtonItem alloc]
    initWithBarButtonSystemItem:UIBarButtonSystemItemFlexibleSpace
    target:nil action:nil];
    UIBarButtonItem *customItem1 = [[UIBarButtonItem alloc]
    initWithTitle:@"Tool1" style:UIBarButtonItemStyleBordered
    target:self action:@selector(toolBarItem1:)];
    UIBarButtonItem *customItem2 = [[UIBarButtonItem alloc]
    initWithTitle:@"Tool2" style:UIBarButtonItemStyleDone
    target:self action:@selector(toolBarItem2:)];
    NSArray *toolbarItems = [NSArray arrayWithObjects:
    customItem1,spaceItem, customItem2, nil];
    UIToolbar *toolbar = [[UIToolbar alloc]initWithFrame:
    CGRectMake(0, 366+54, 320, 50)];
    [toolbar setBarStyle:UIBarStyleBlackOpaque];
    [self.view addSubview:toolbar];
    [toolbar setItems:toolbarItems];
}
為了解所執行的操作我們在我們的ViewController.xib中添加UILabel Iboutlet並為 UILabel 創建命名為標籤的IBoutlet。
我們還需要添加兩個方法來執行,如下所示的工具欄項的操作:
-(IBAction)toolBarItem1:(id)sender{
    [label setText:@"Tool 1 Selected"];
}

-(IBAction)toolBarItem2:(id)sender{
    [label setText:@"Tool 2 Selected"];
}
在ViewController.m中更新 viewDidLoad,如下所示:
- (void)viewDidLoad
{
    [super viewDidLoad];
    // The method hideStatusbar called after 2 seconds
    [self addToolbar];
    // Do any additional setup after loading the view, typically from a nib.
}
輸出
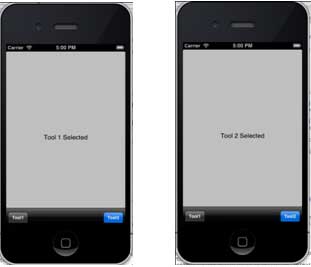
現在當我們運行該應用程式我們會看到下麵的輸出。
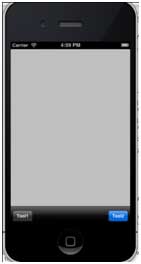
單擊我們得到的 tool1 和 tool2 欄按鈕